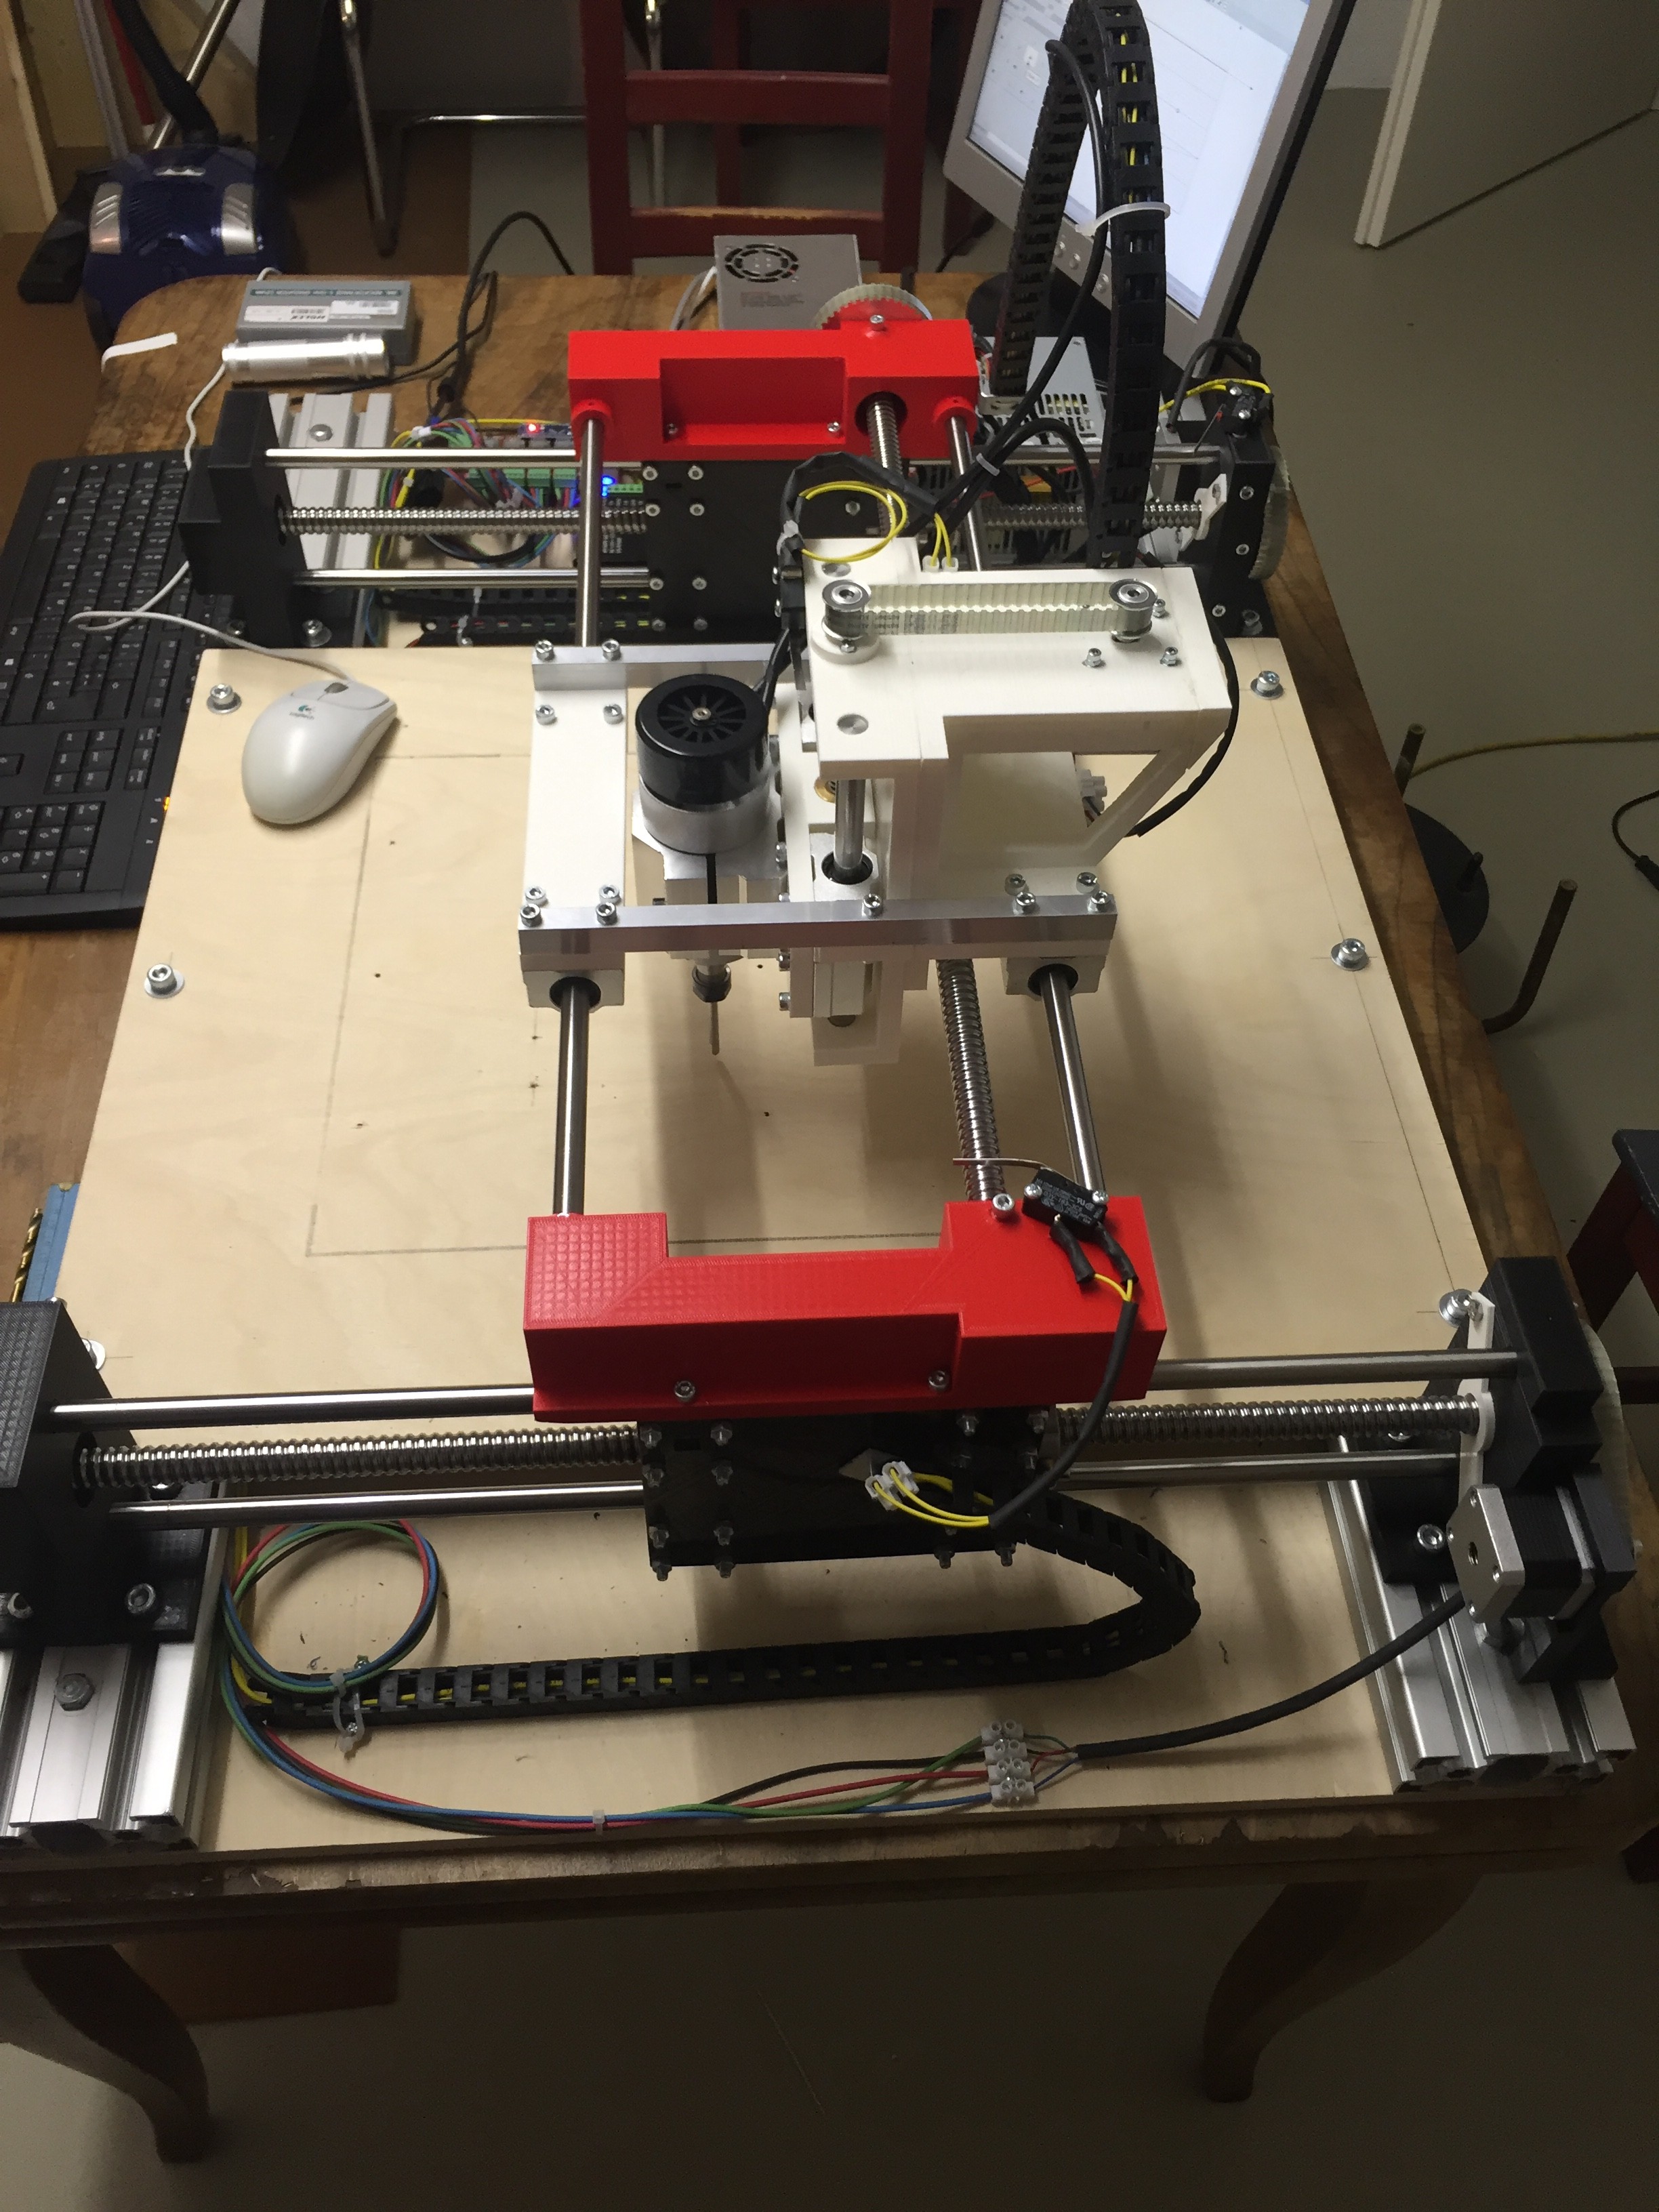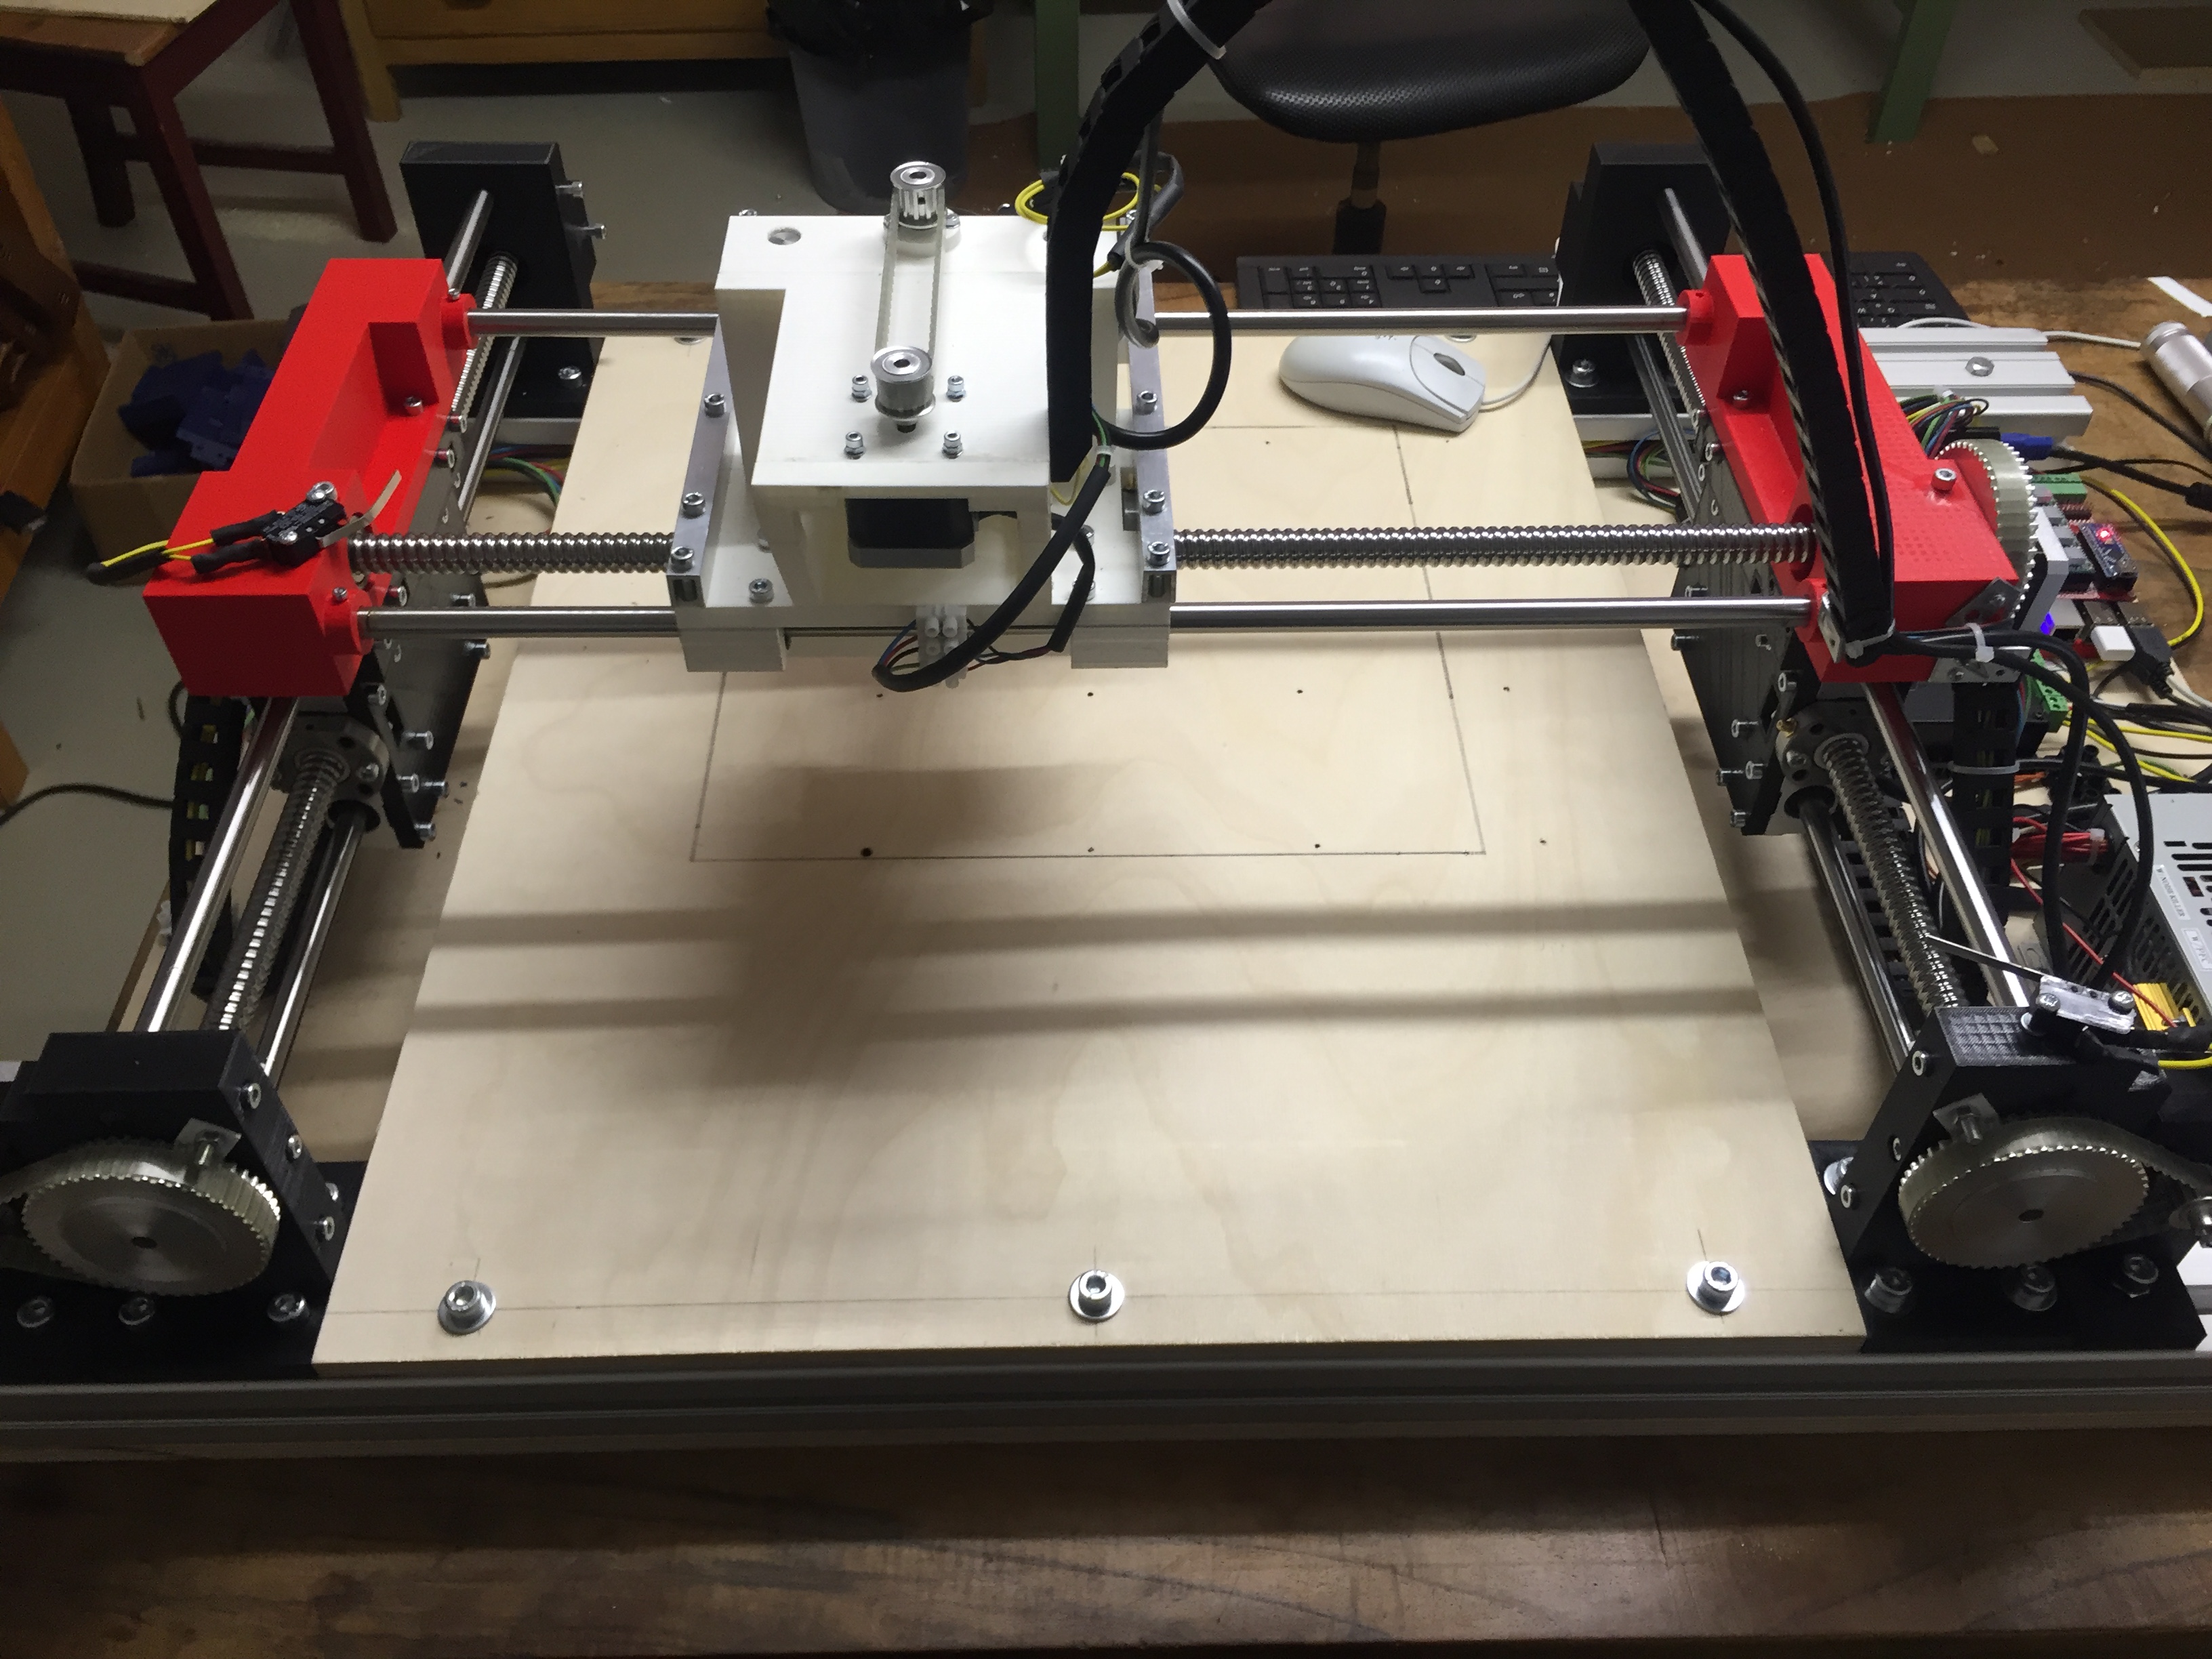
Updated 3 Axis CNC Platform:
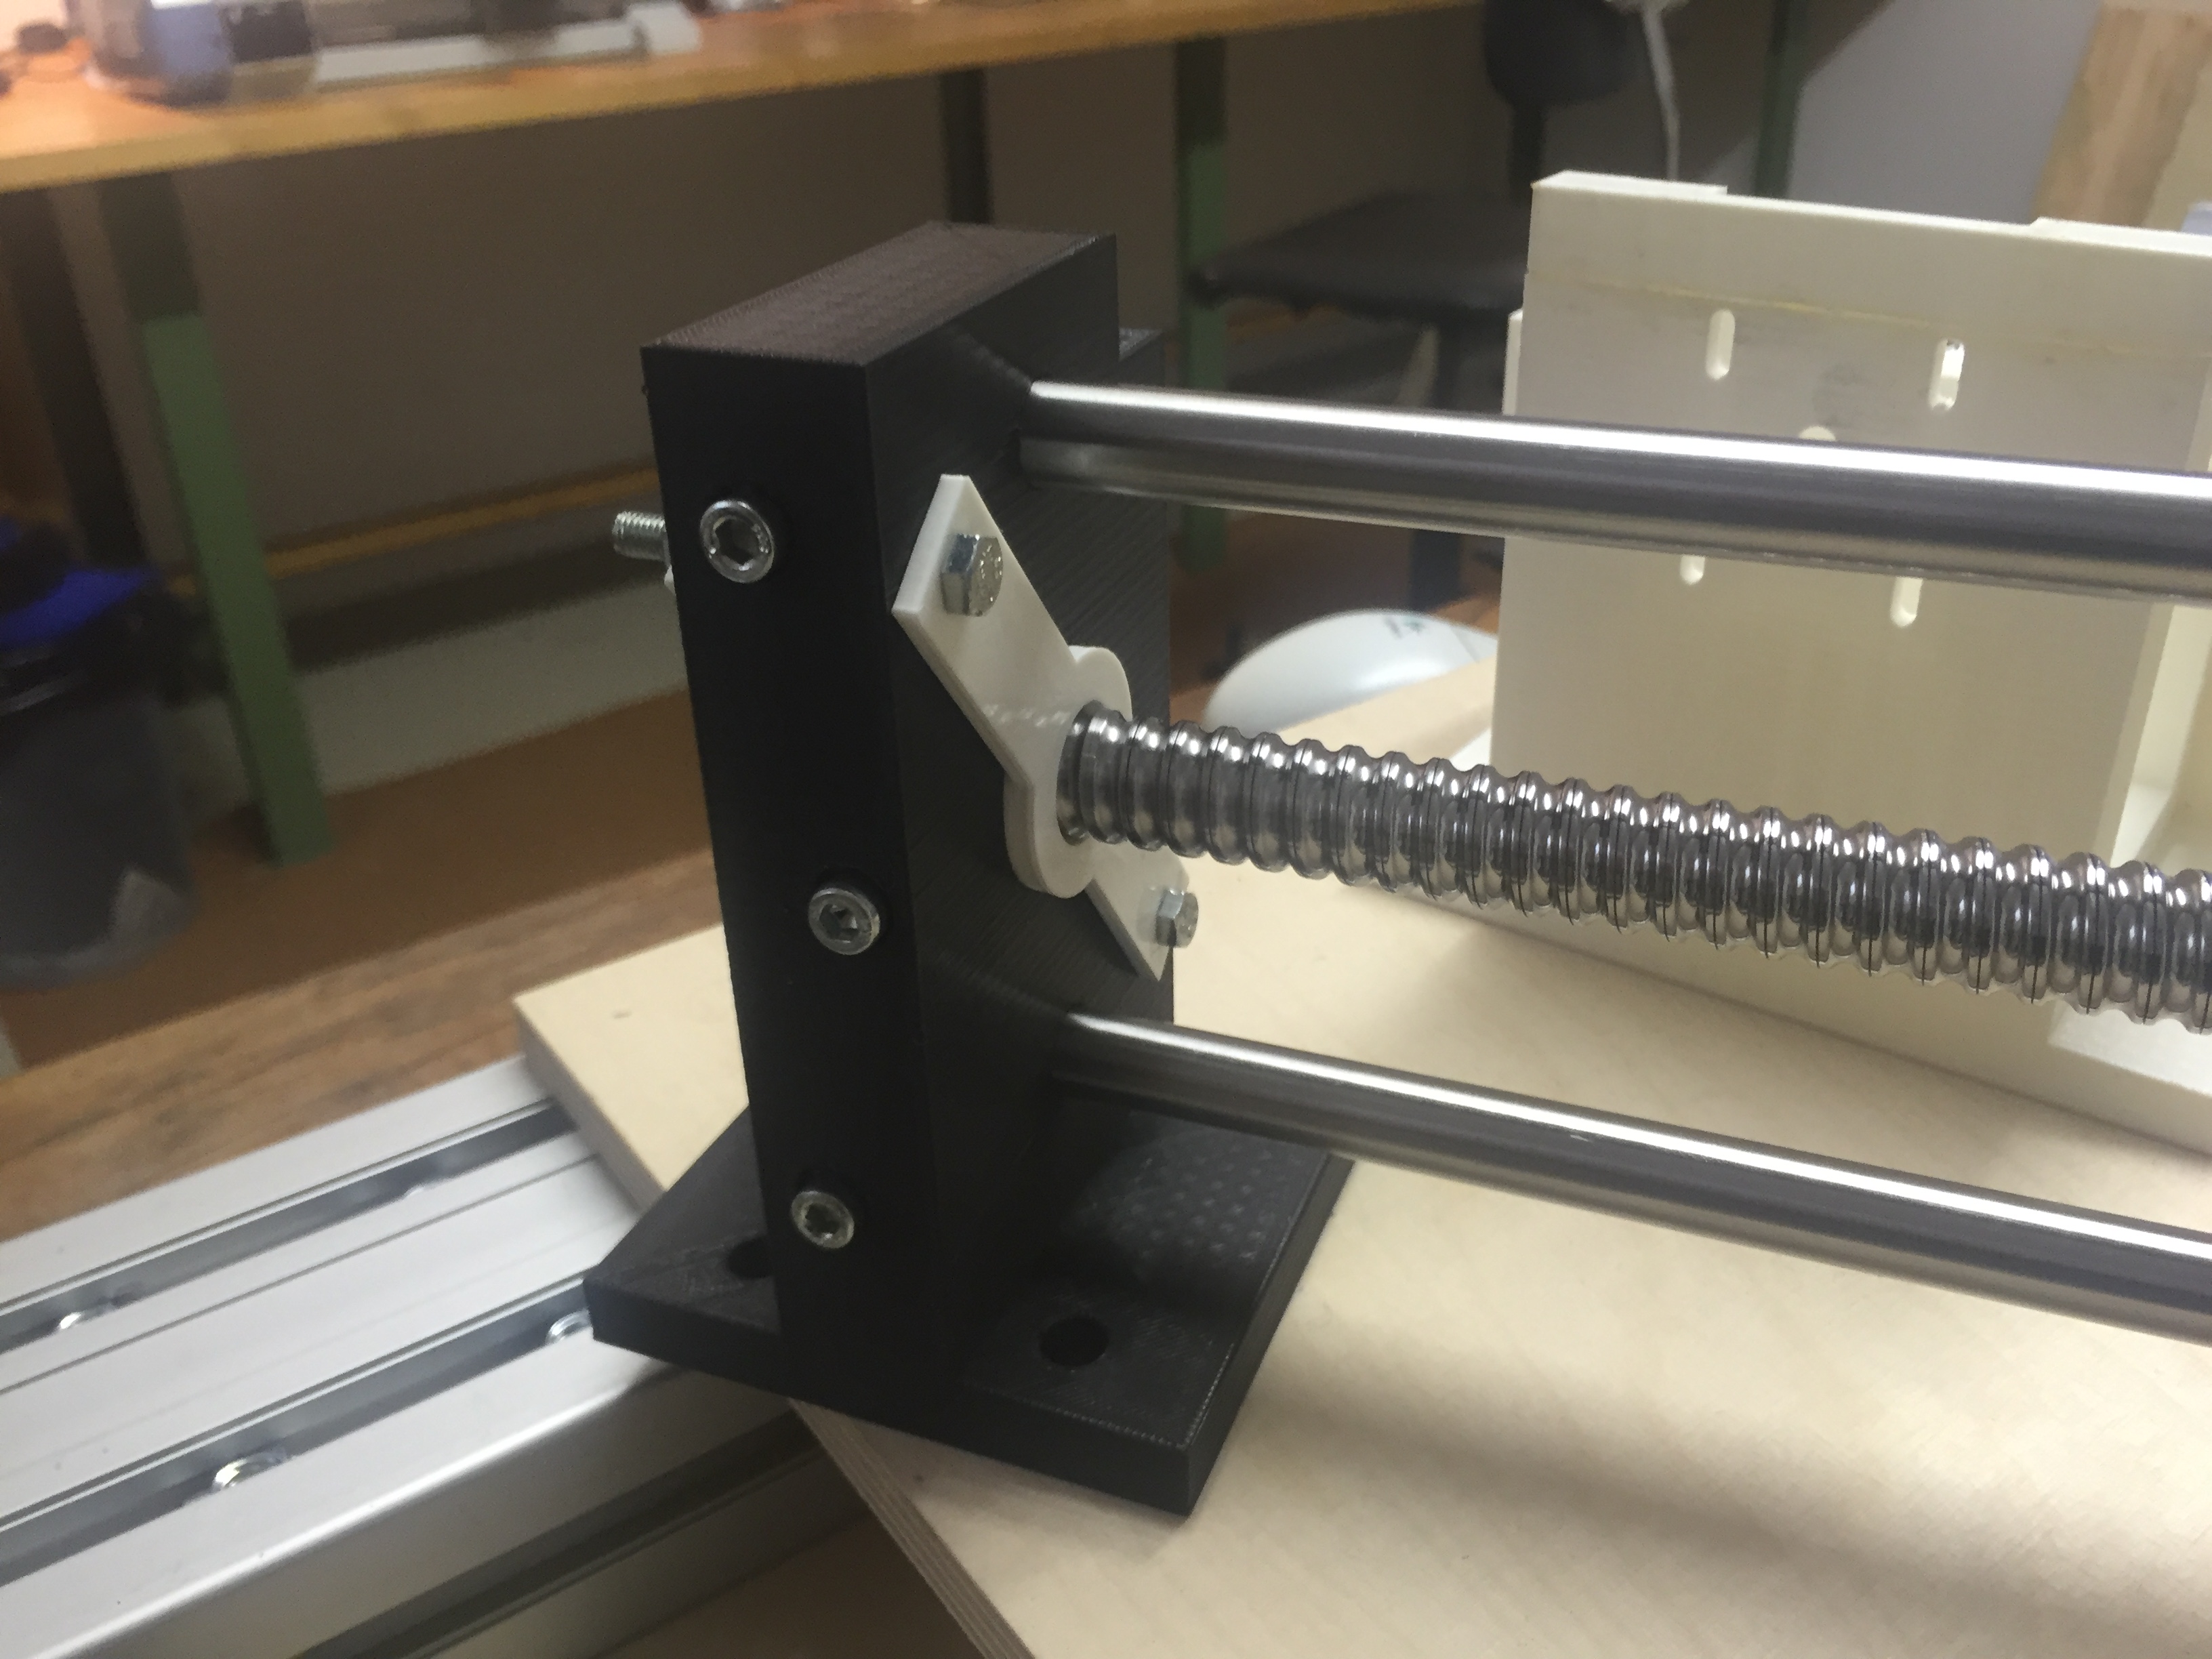
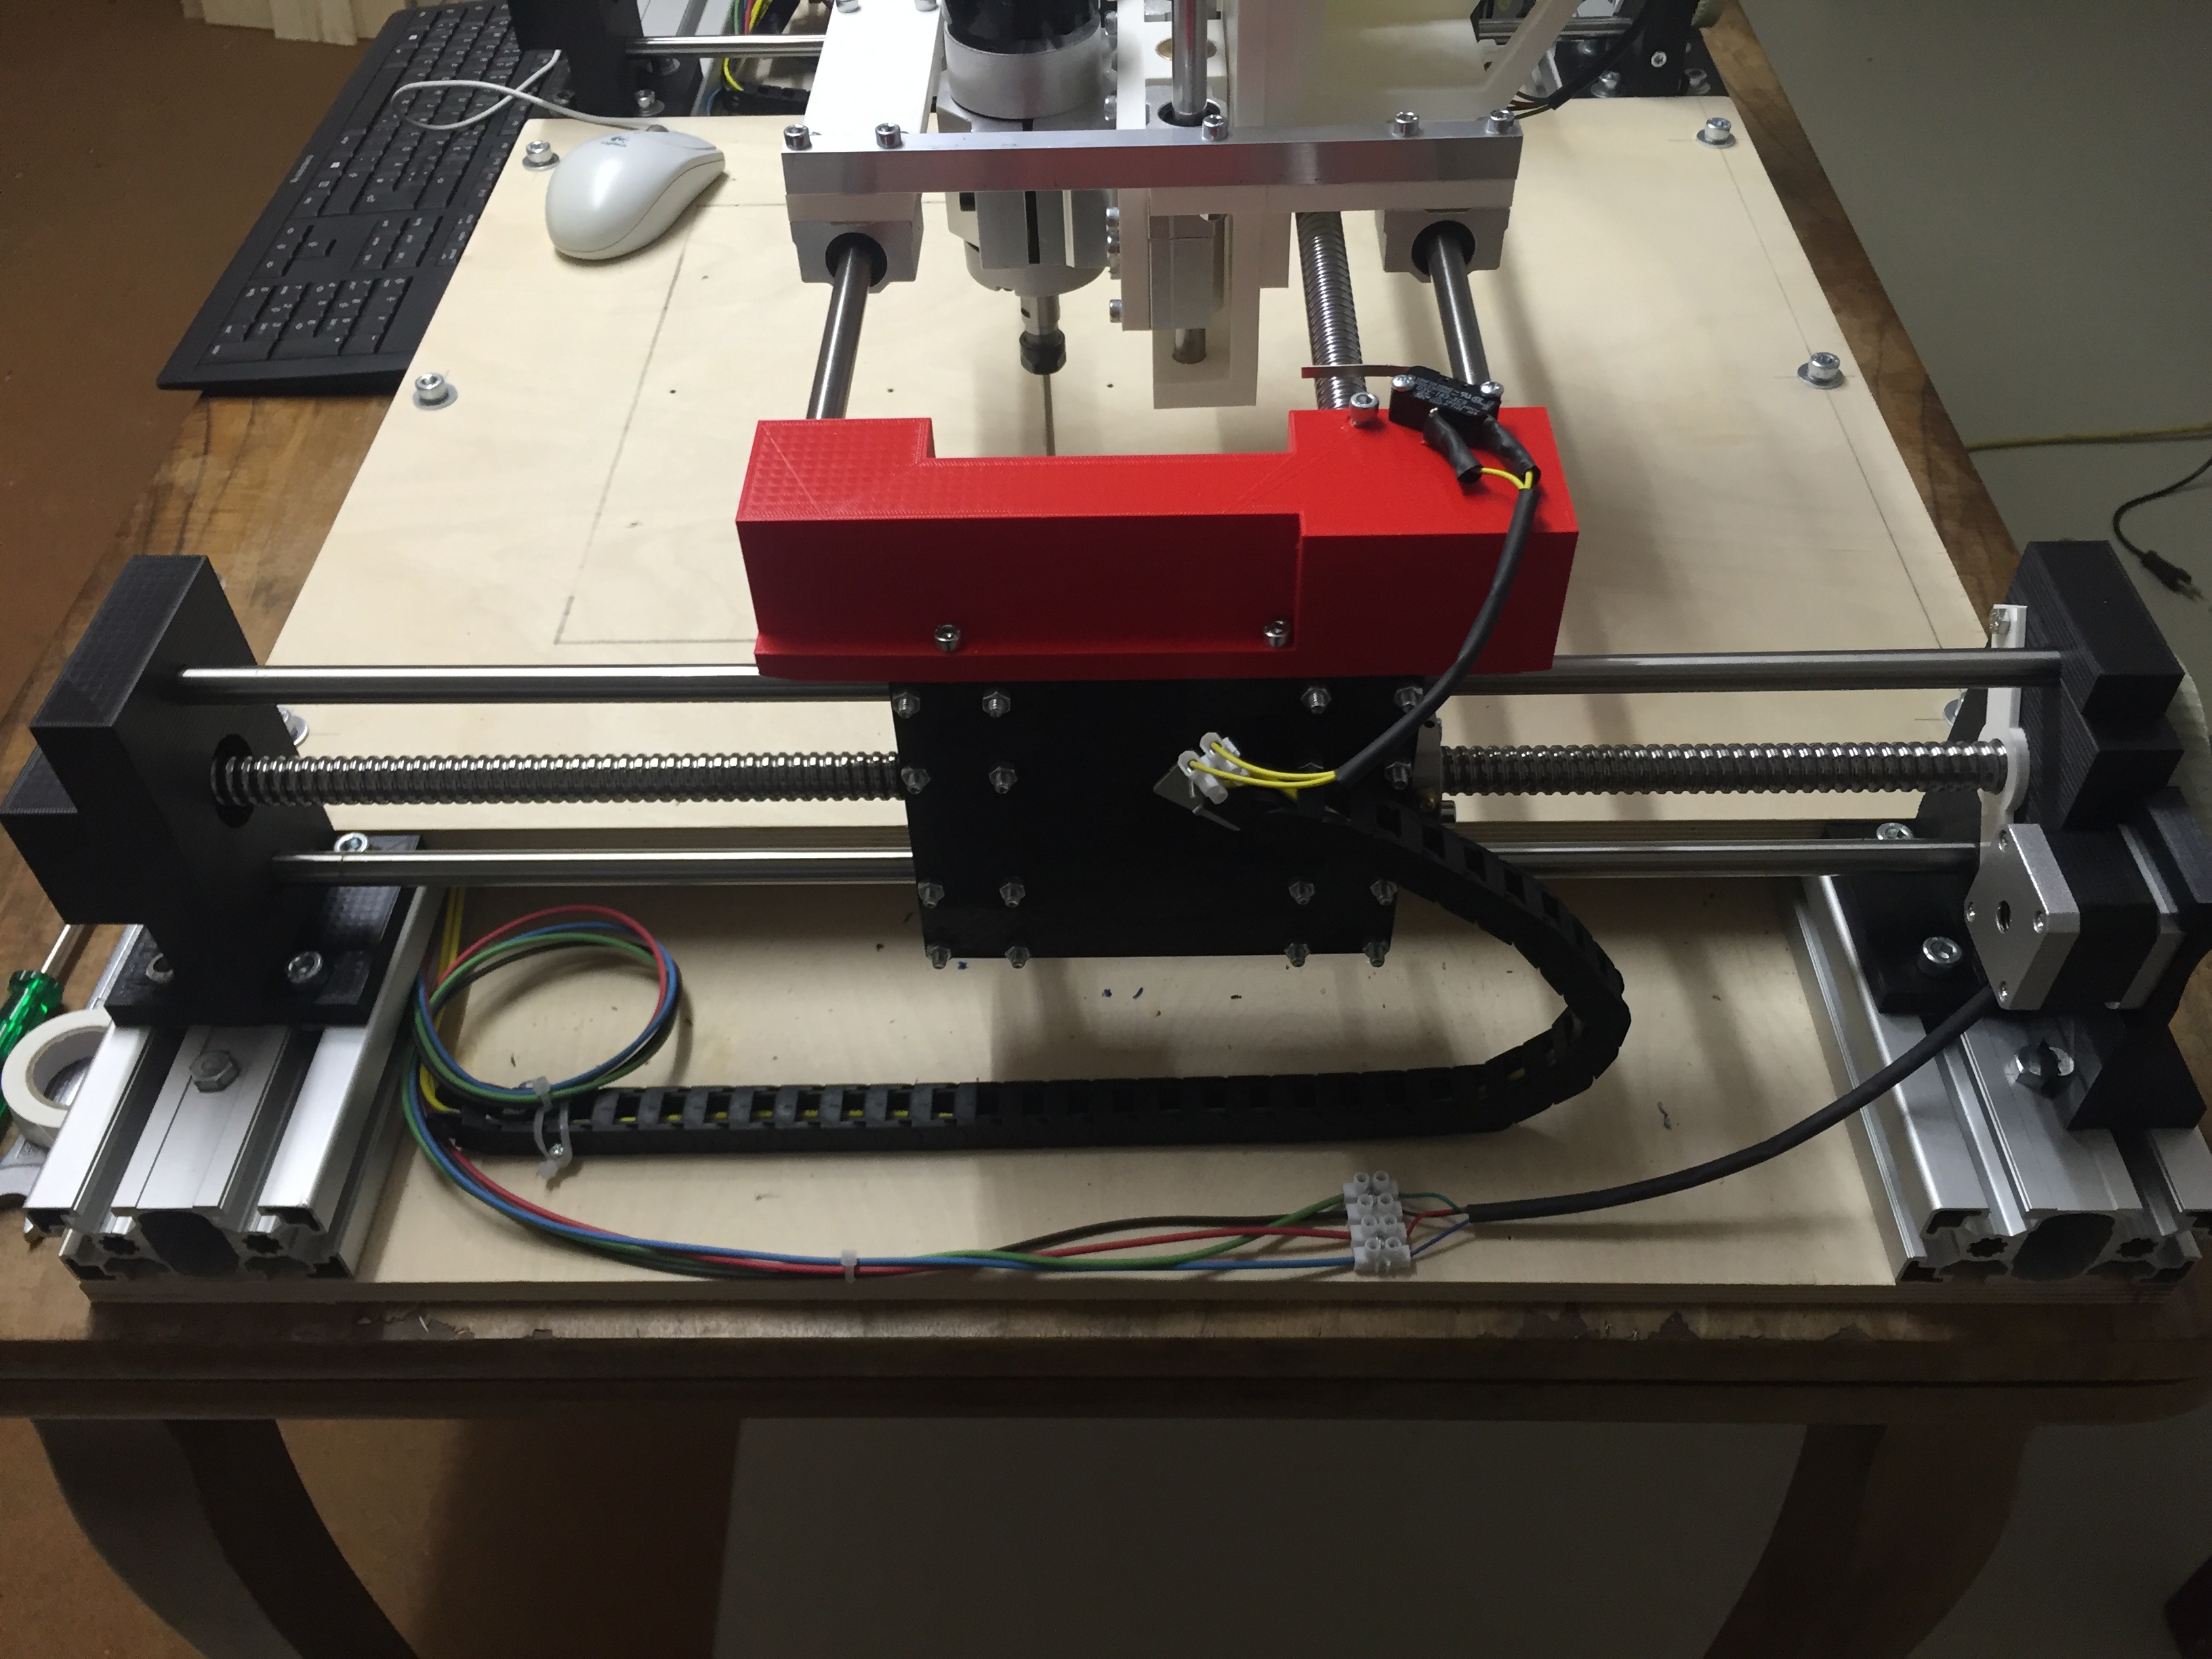
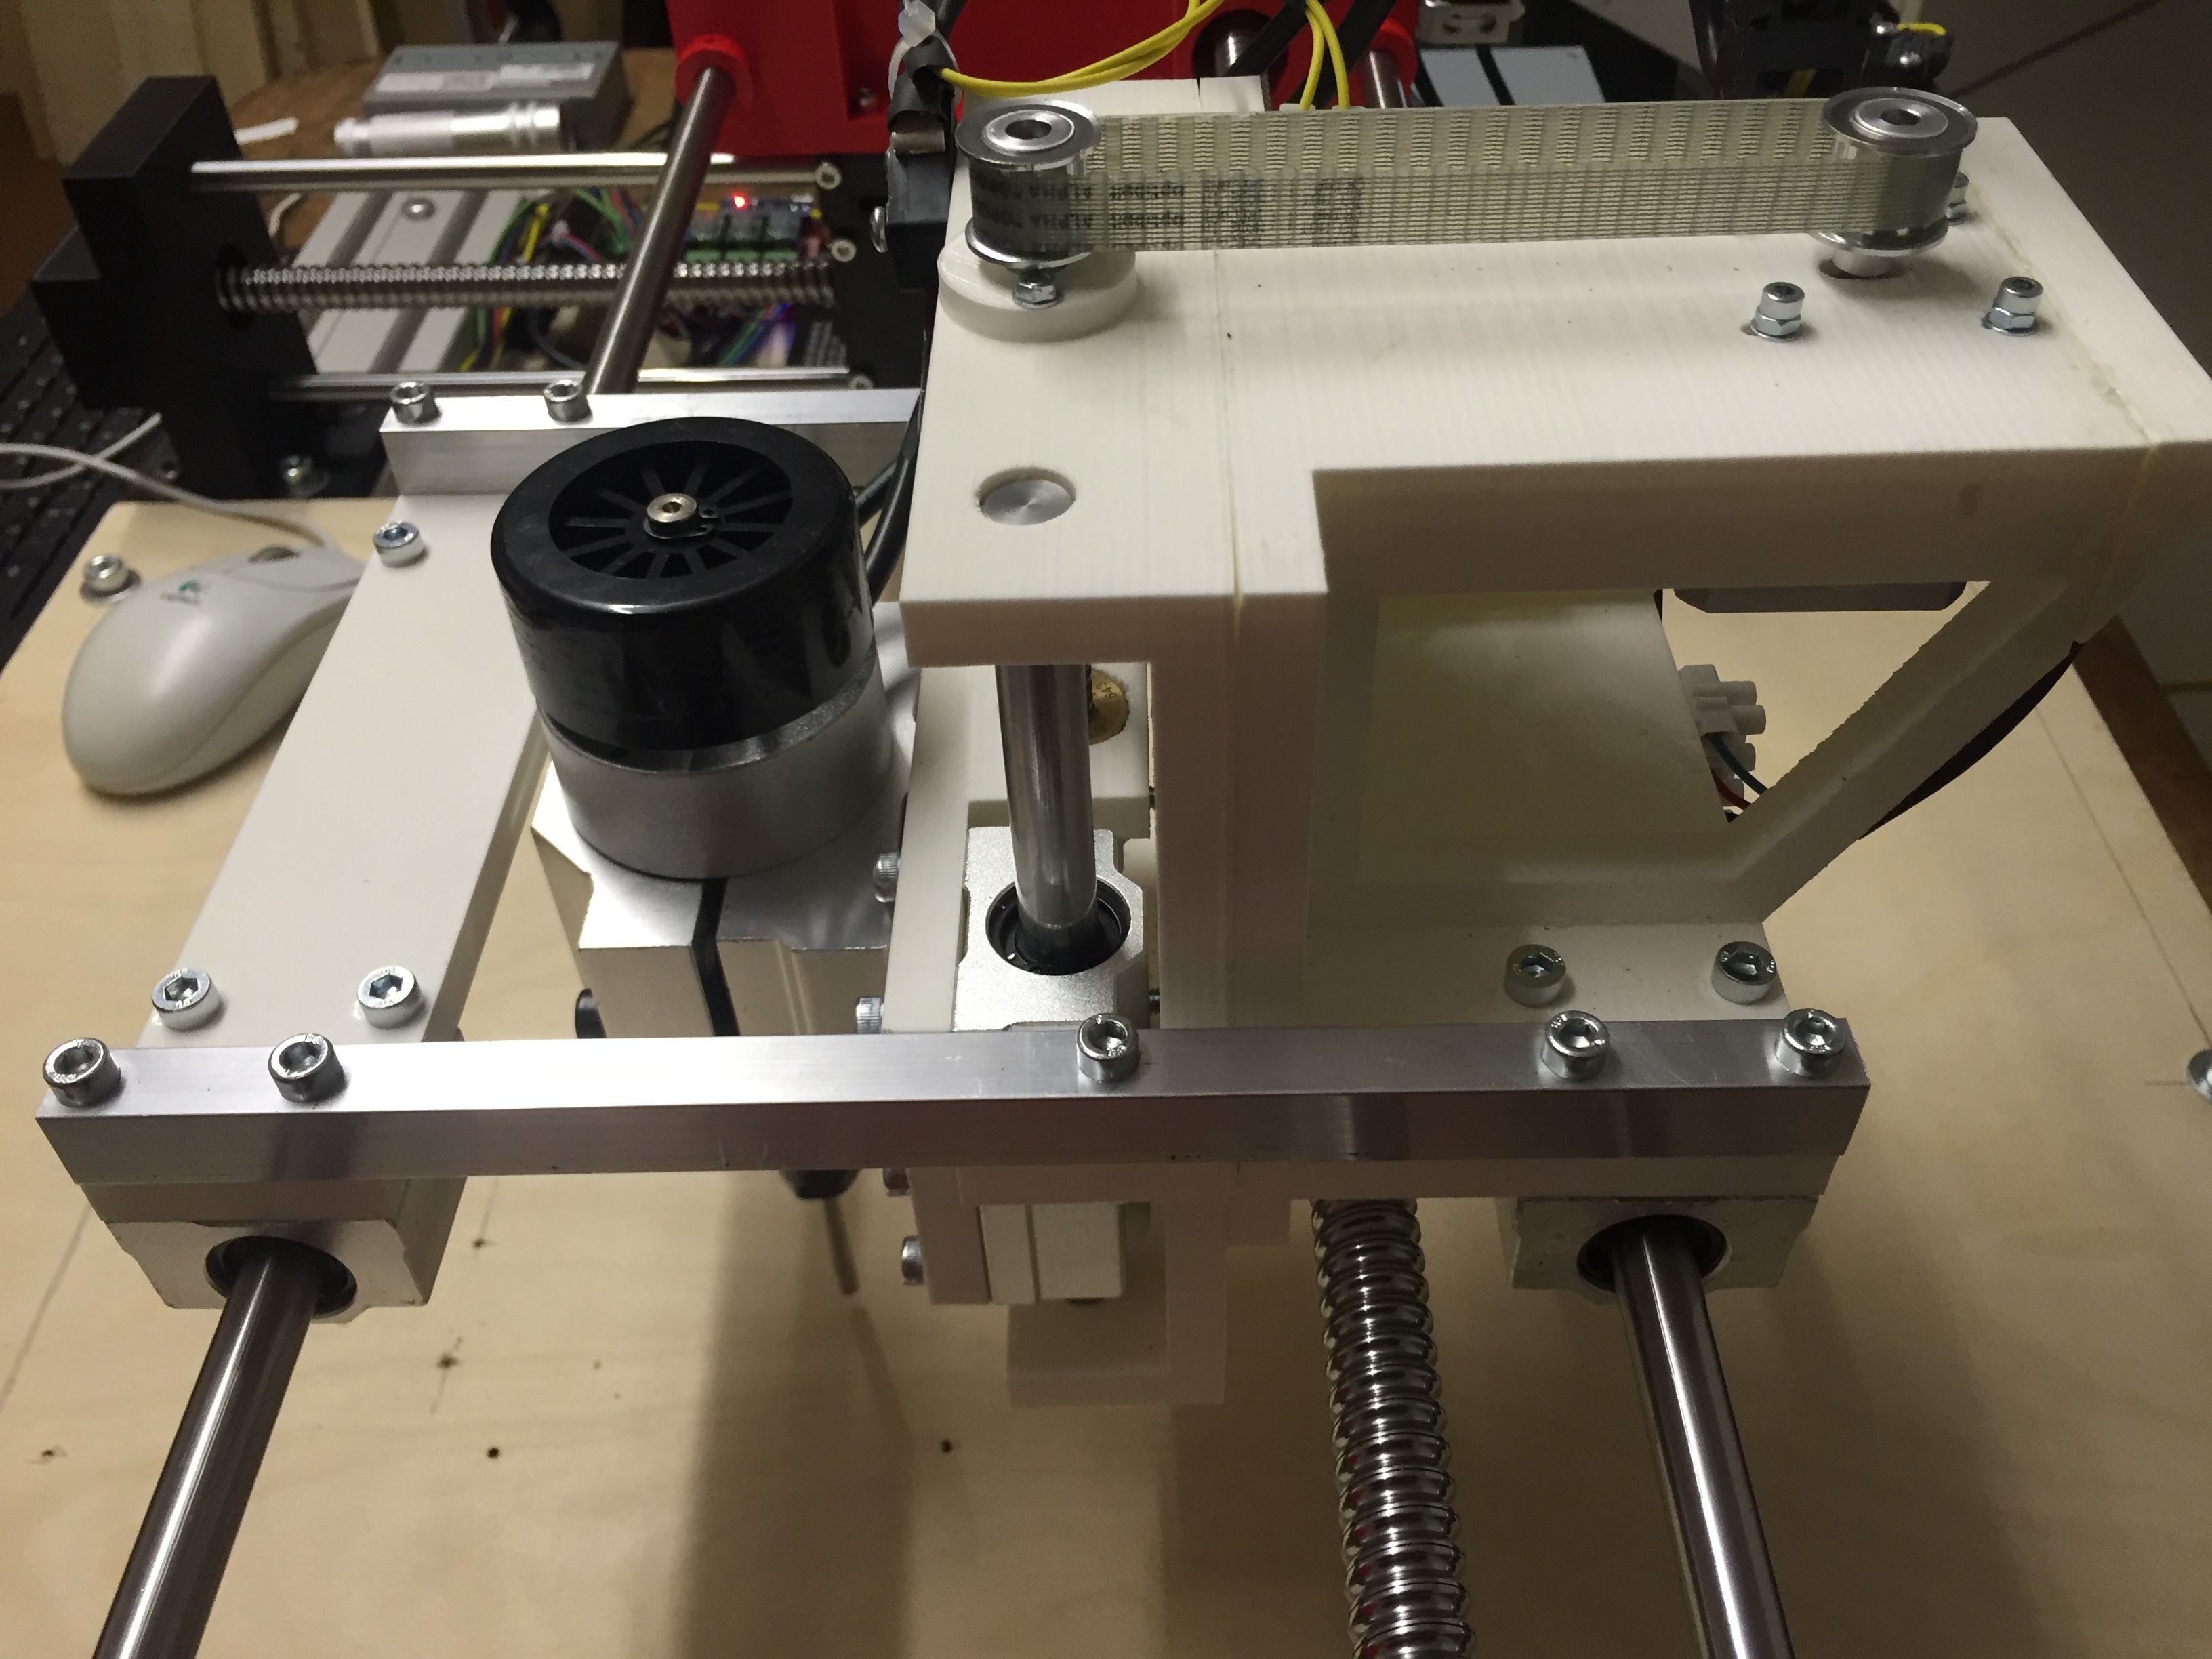
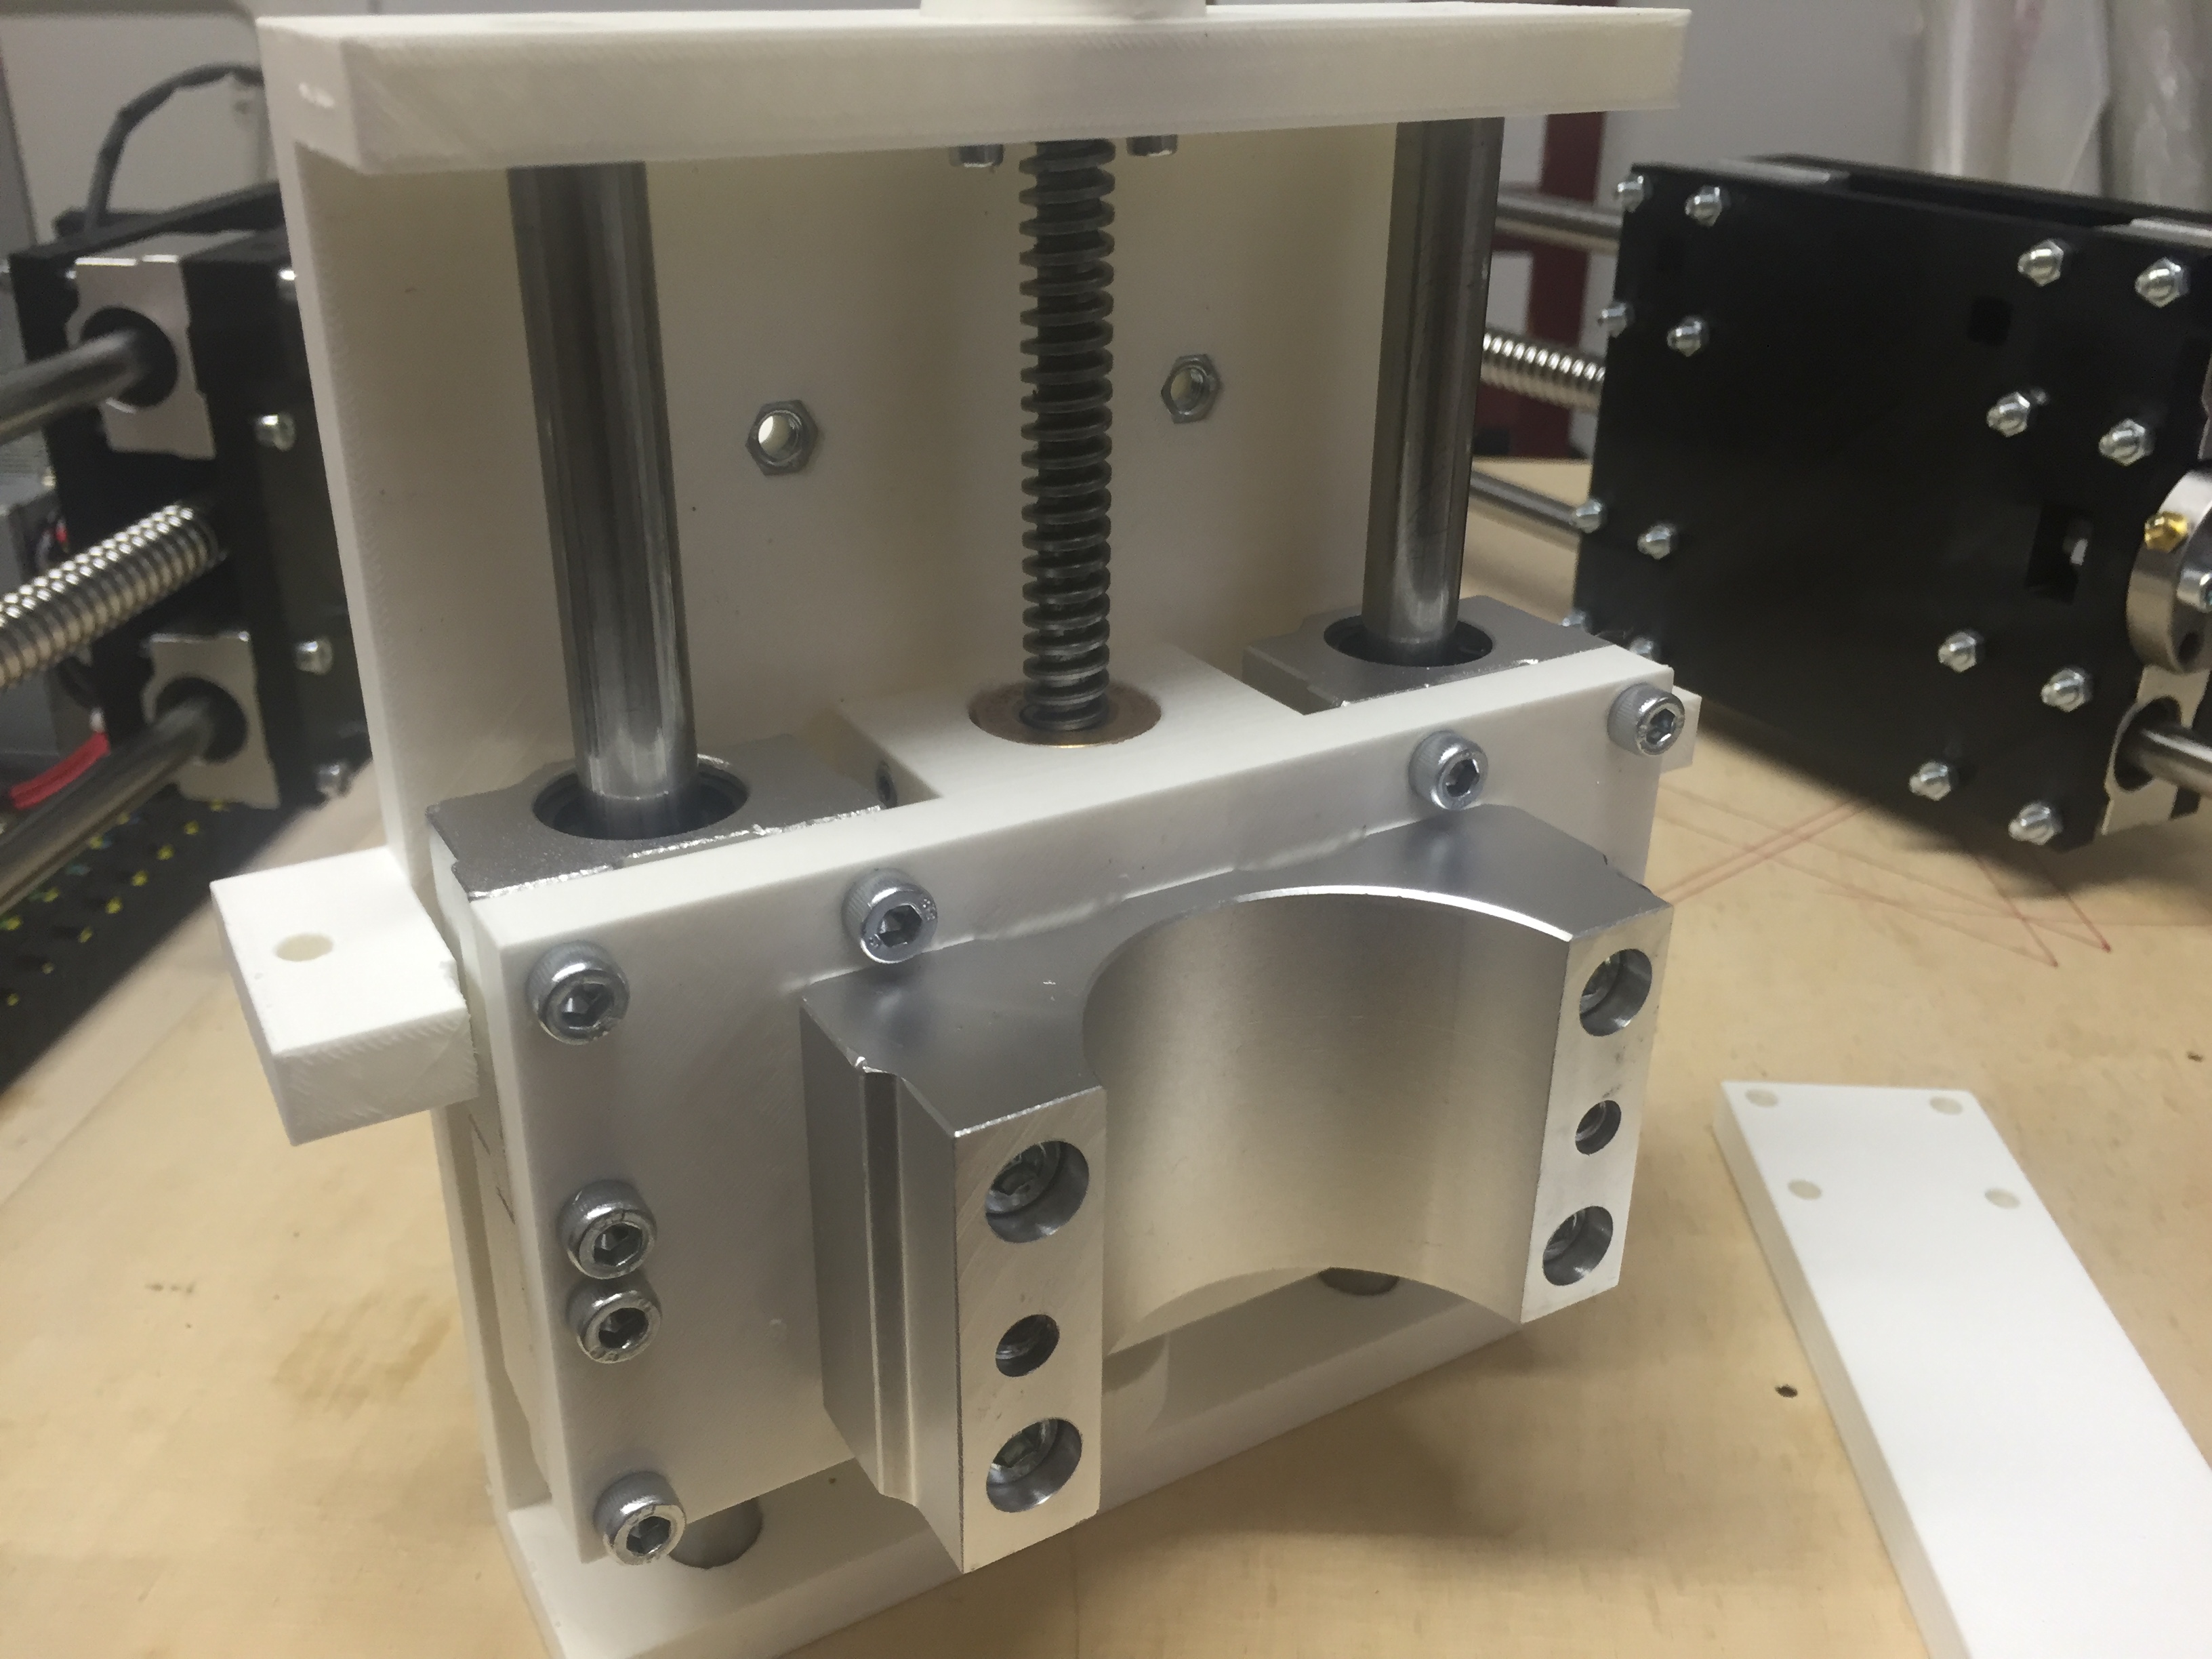
- Replaced the Tooth Belts with 16mm Ball Screws.
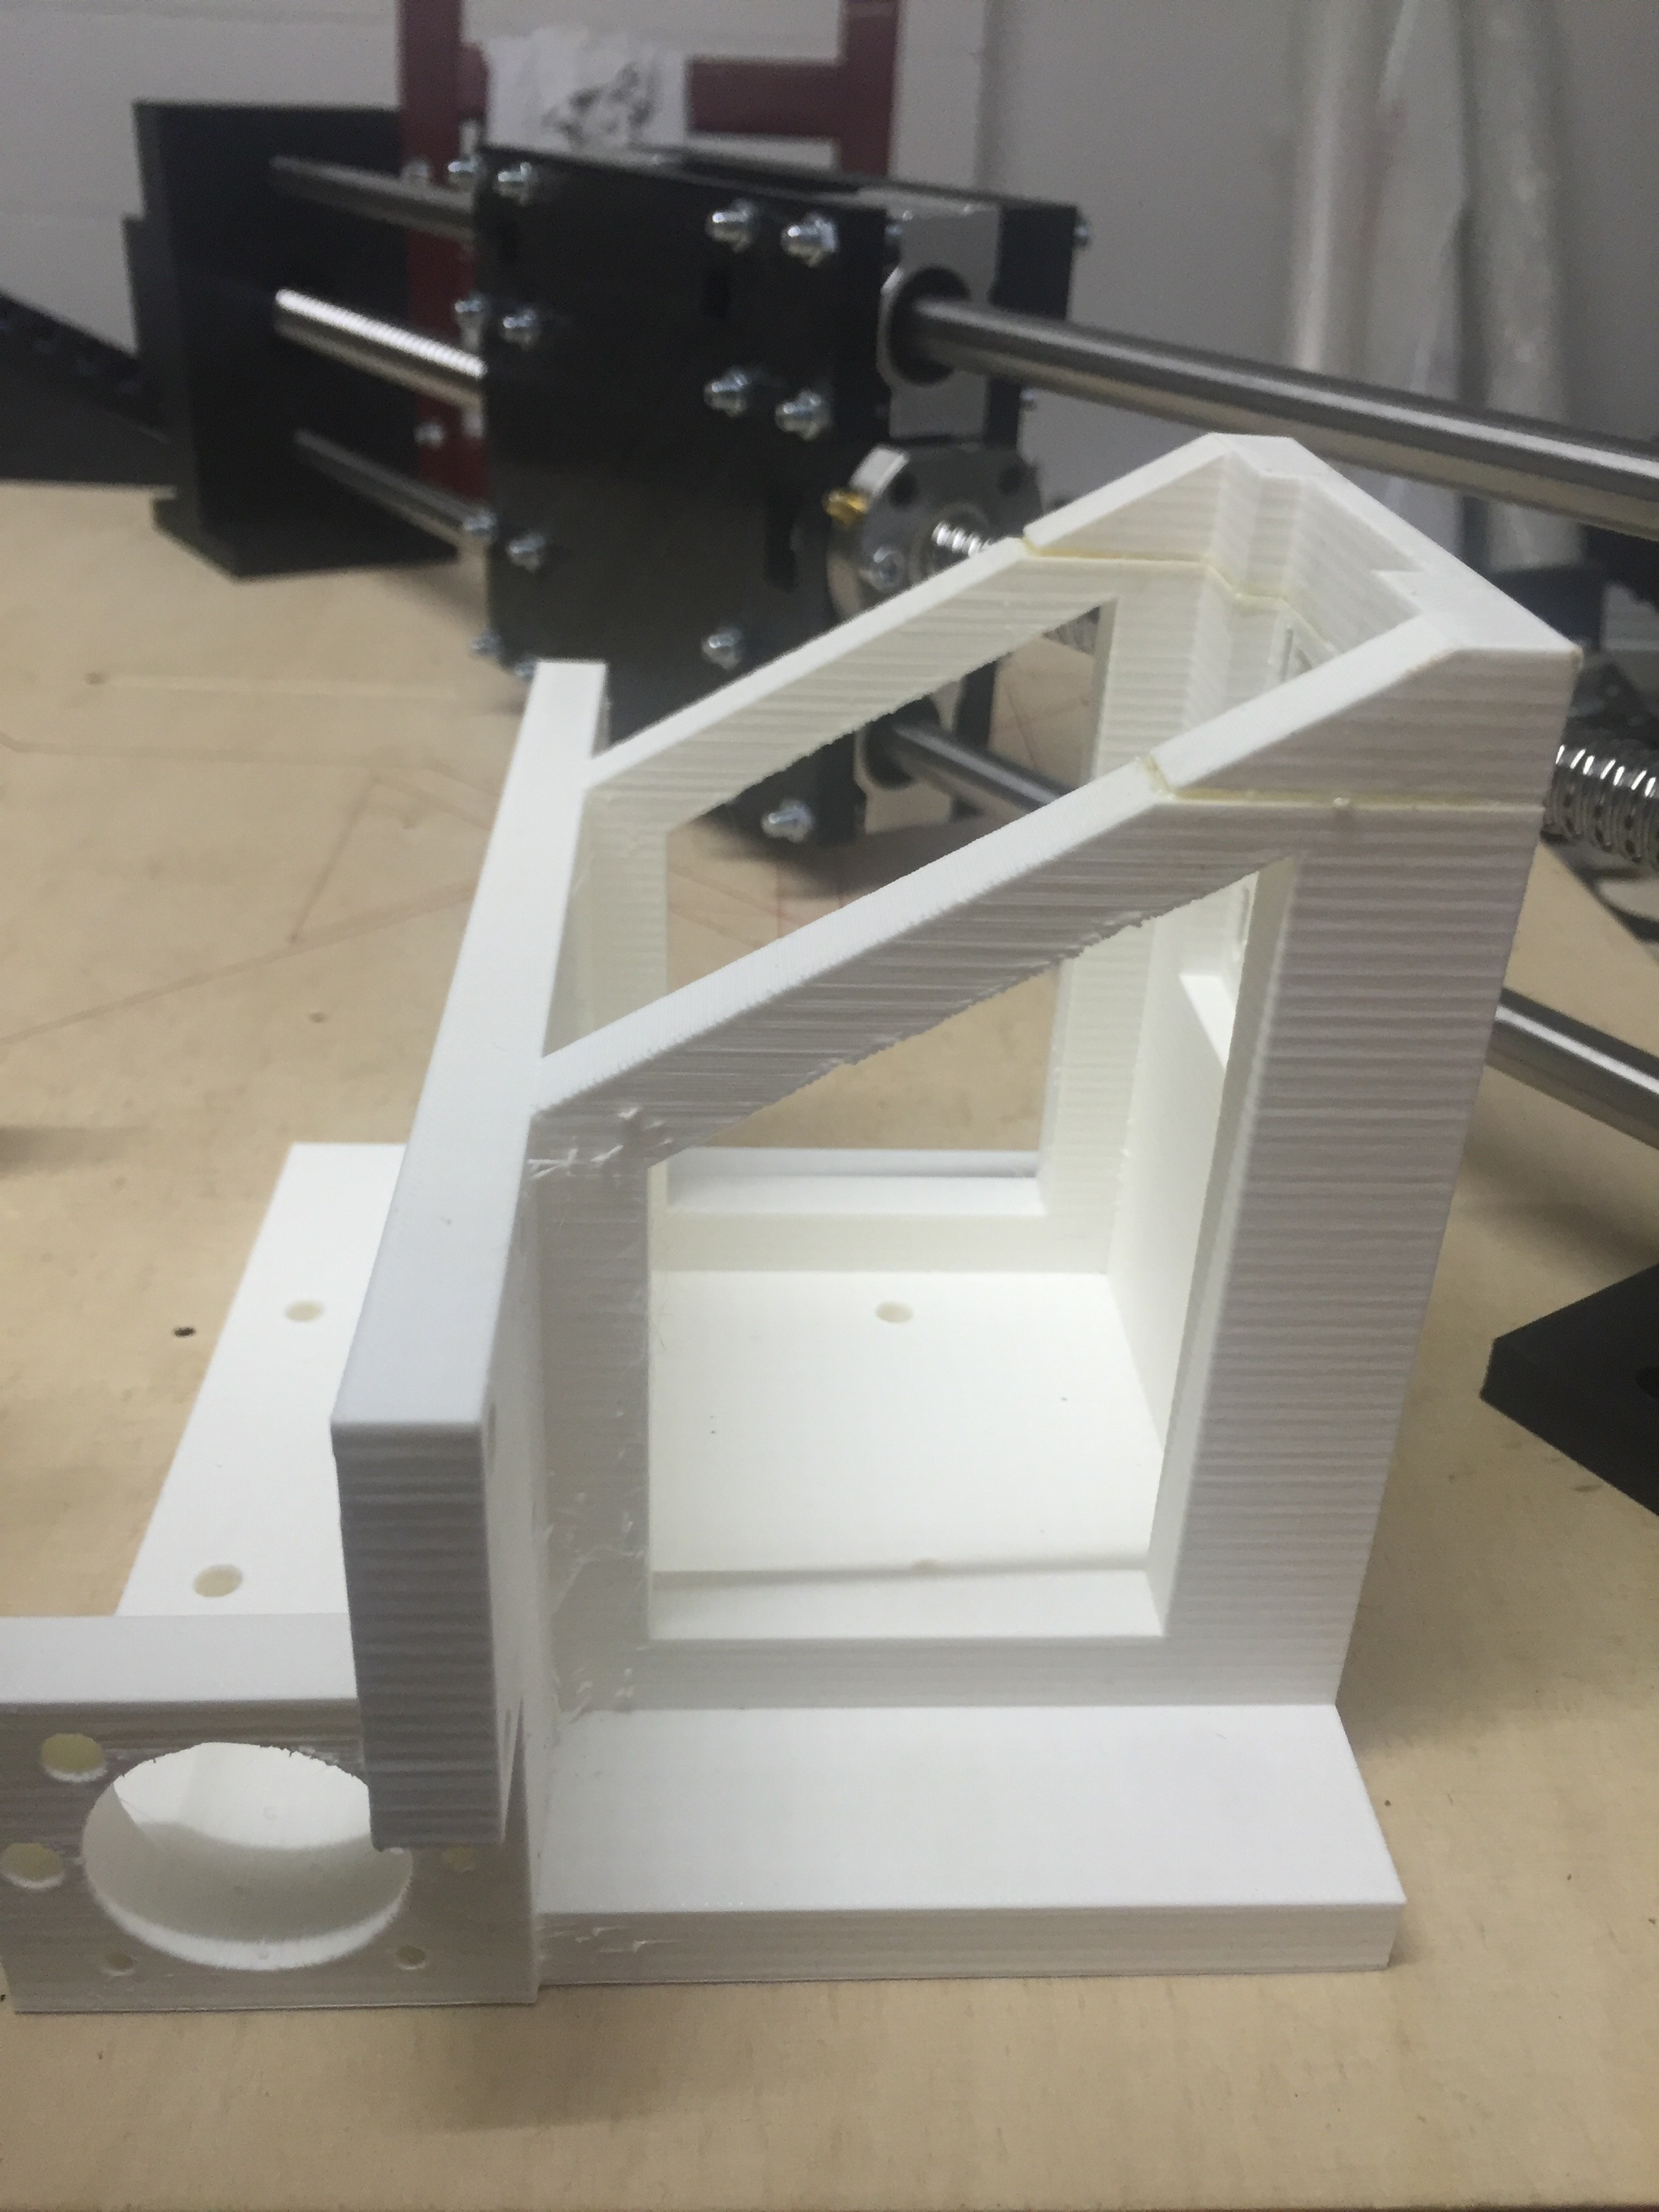
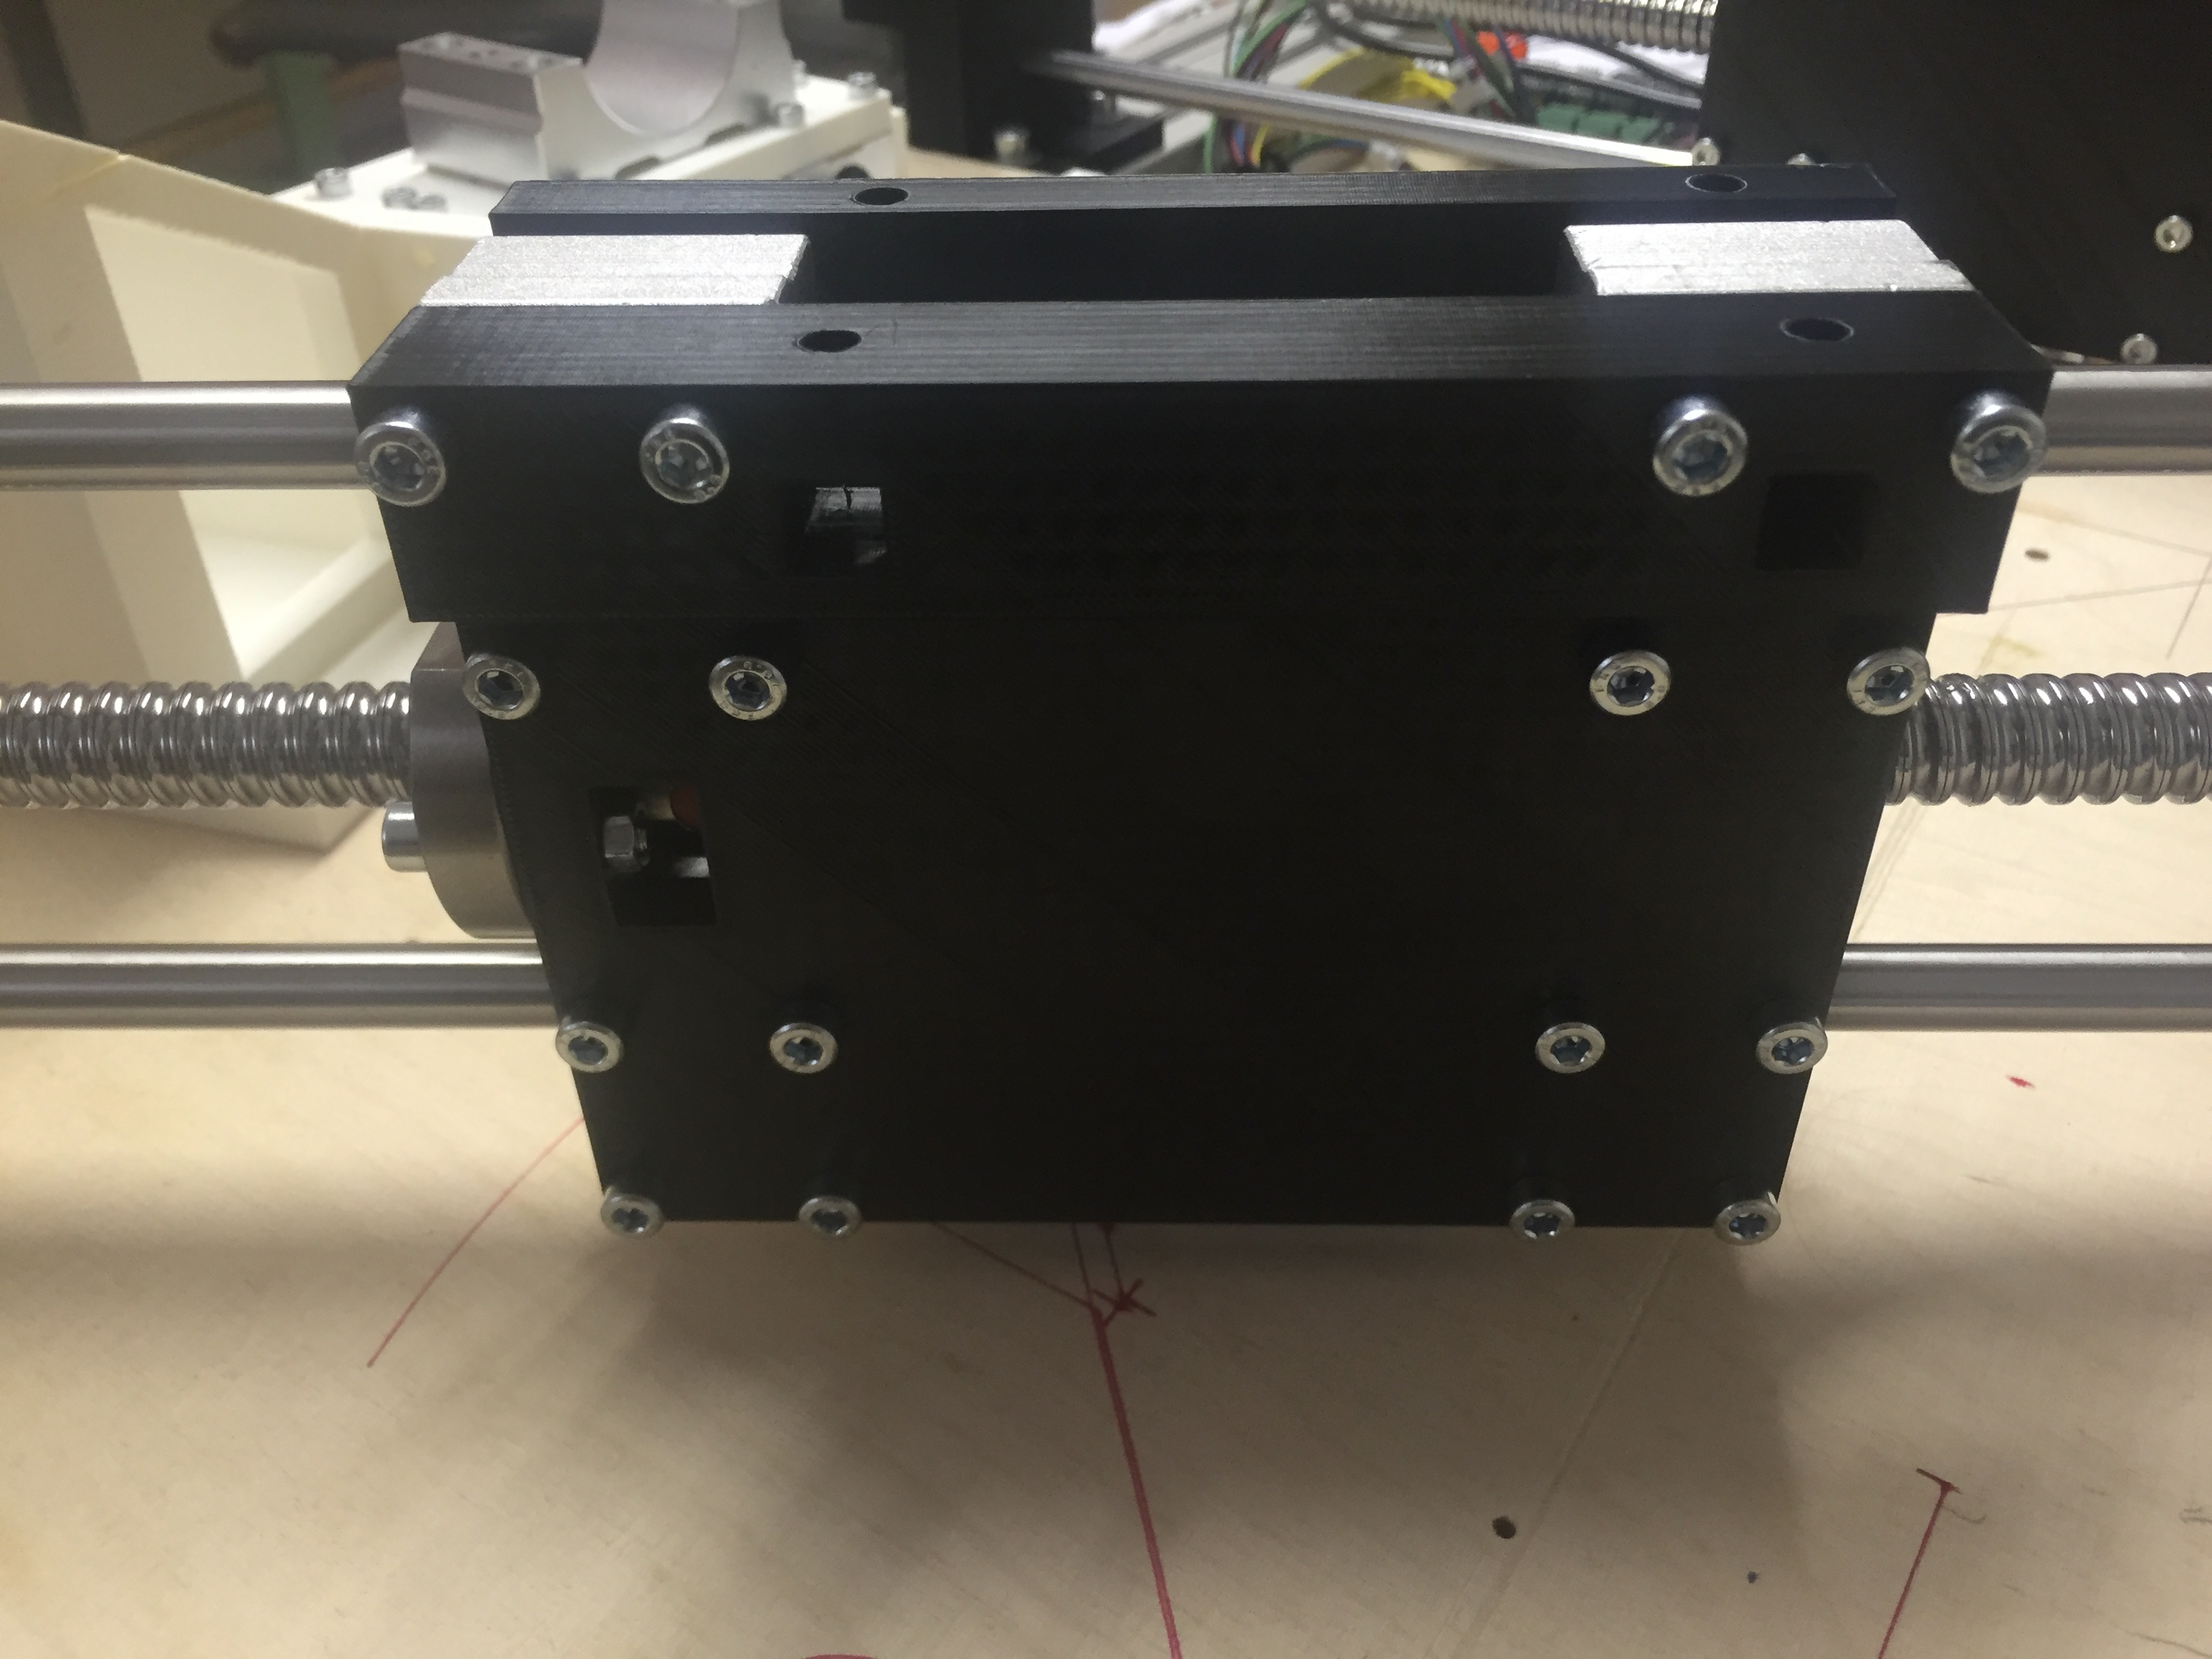
- Printed parts modified for more stability and to handle forces and torques better.
The goal was to use all "buy Parts" from the old version except the tooth belts. The ball screws are the only new parts to buy. All printable parts got modified.
The "real Thing" is completed. Precision is pretty good ( < +/- 0.02mm)
Total cost: ~ 1'000 $
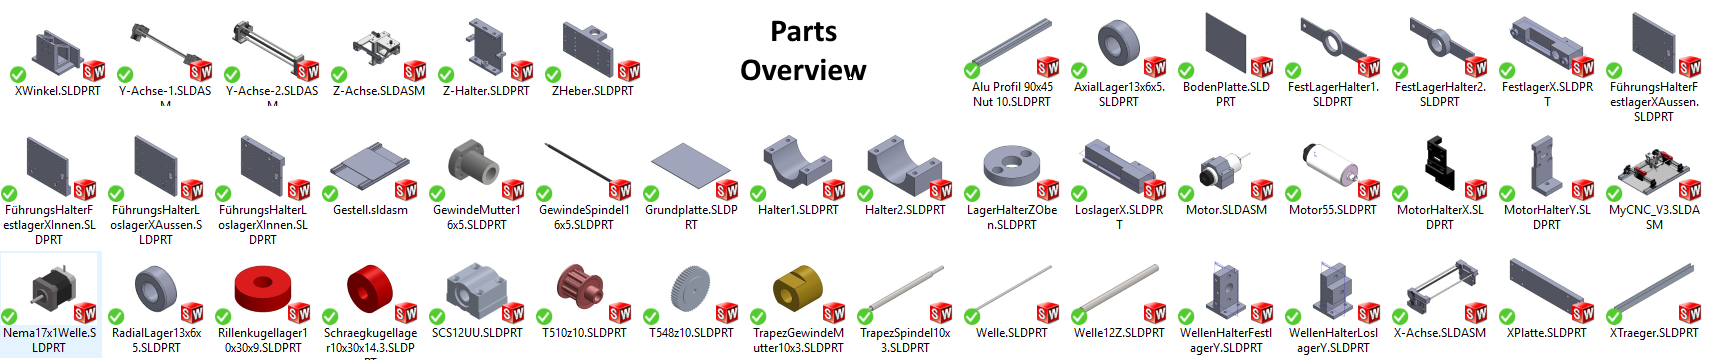
For all exact dimensions, check out the CAD models first and get familiar with the design of the whole thing.
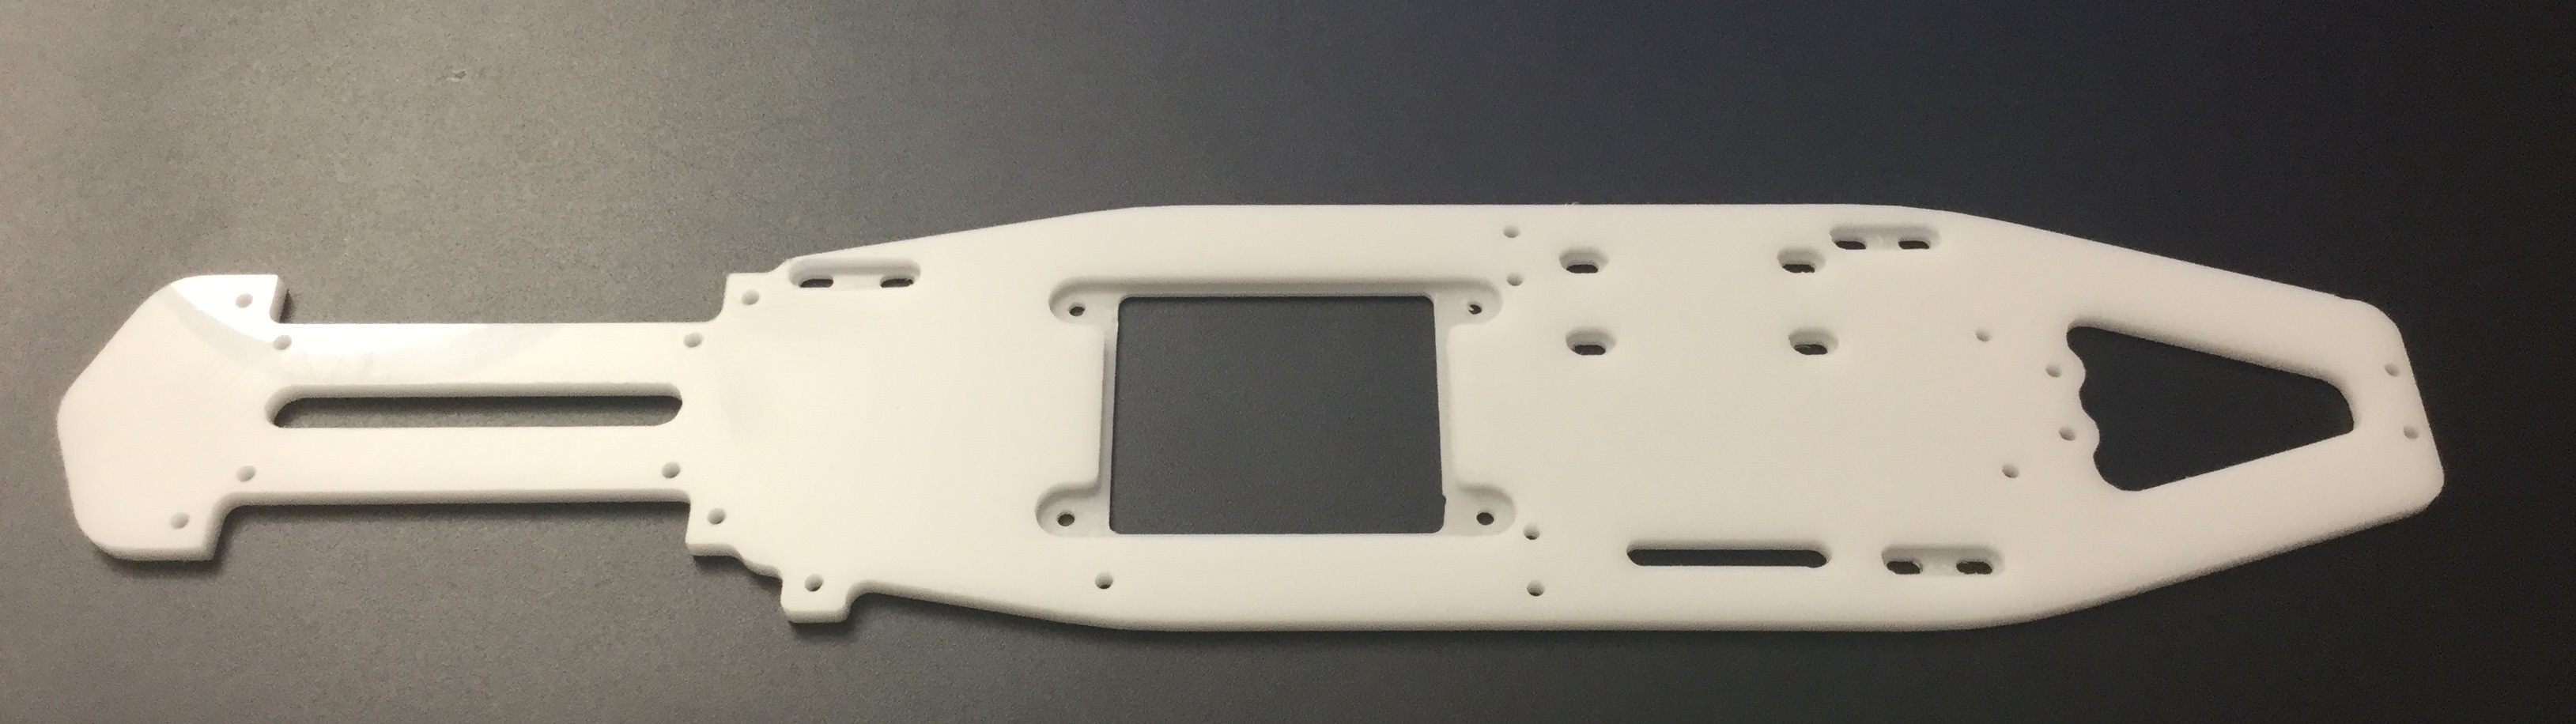
| 1 | Print all printable parts. Download the STL's and print | I used ProFill PLA, 20% infill |
| 2 | Prepare 8 linear guide shafts 12mm diameter. Length: 6x600mm and 2x200mm | Polished steel H9 |
| 3 | Mount the Aluminium profiles on the Base Plate. Mount Working plate on the Aluminium profiles | I used 12mm hard wood for both |
| 4 |
Assemble the whole thing according to the CAD model You need Screws M3, M5, M6, M8 various length |
- Y Axis first - X Axis second - Z Axis last |
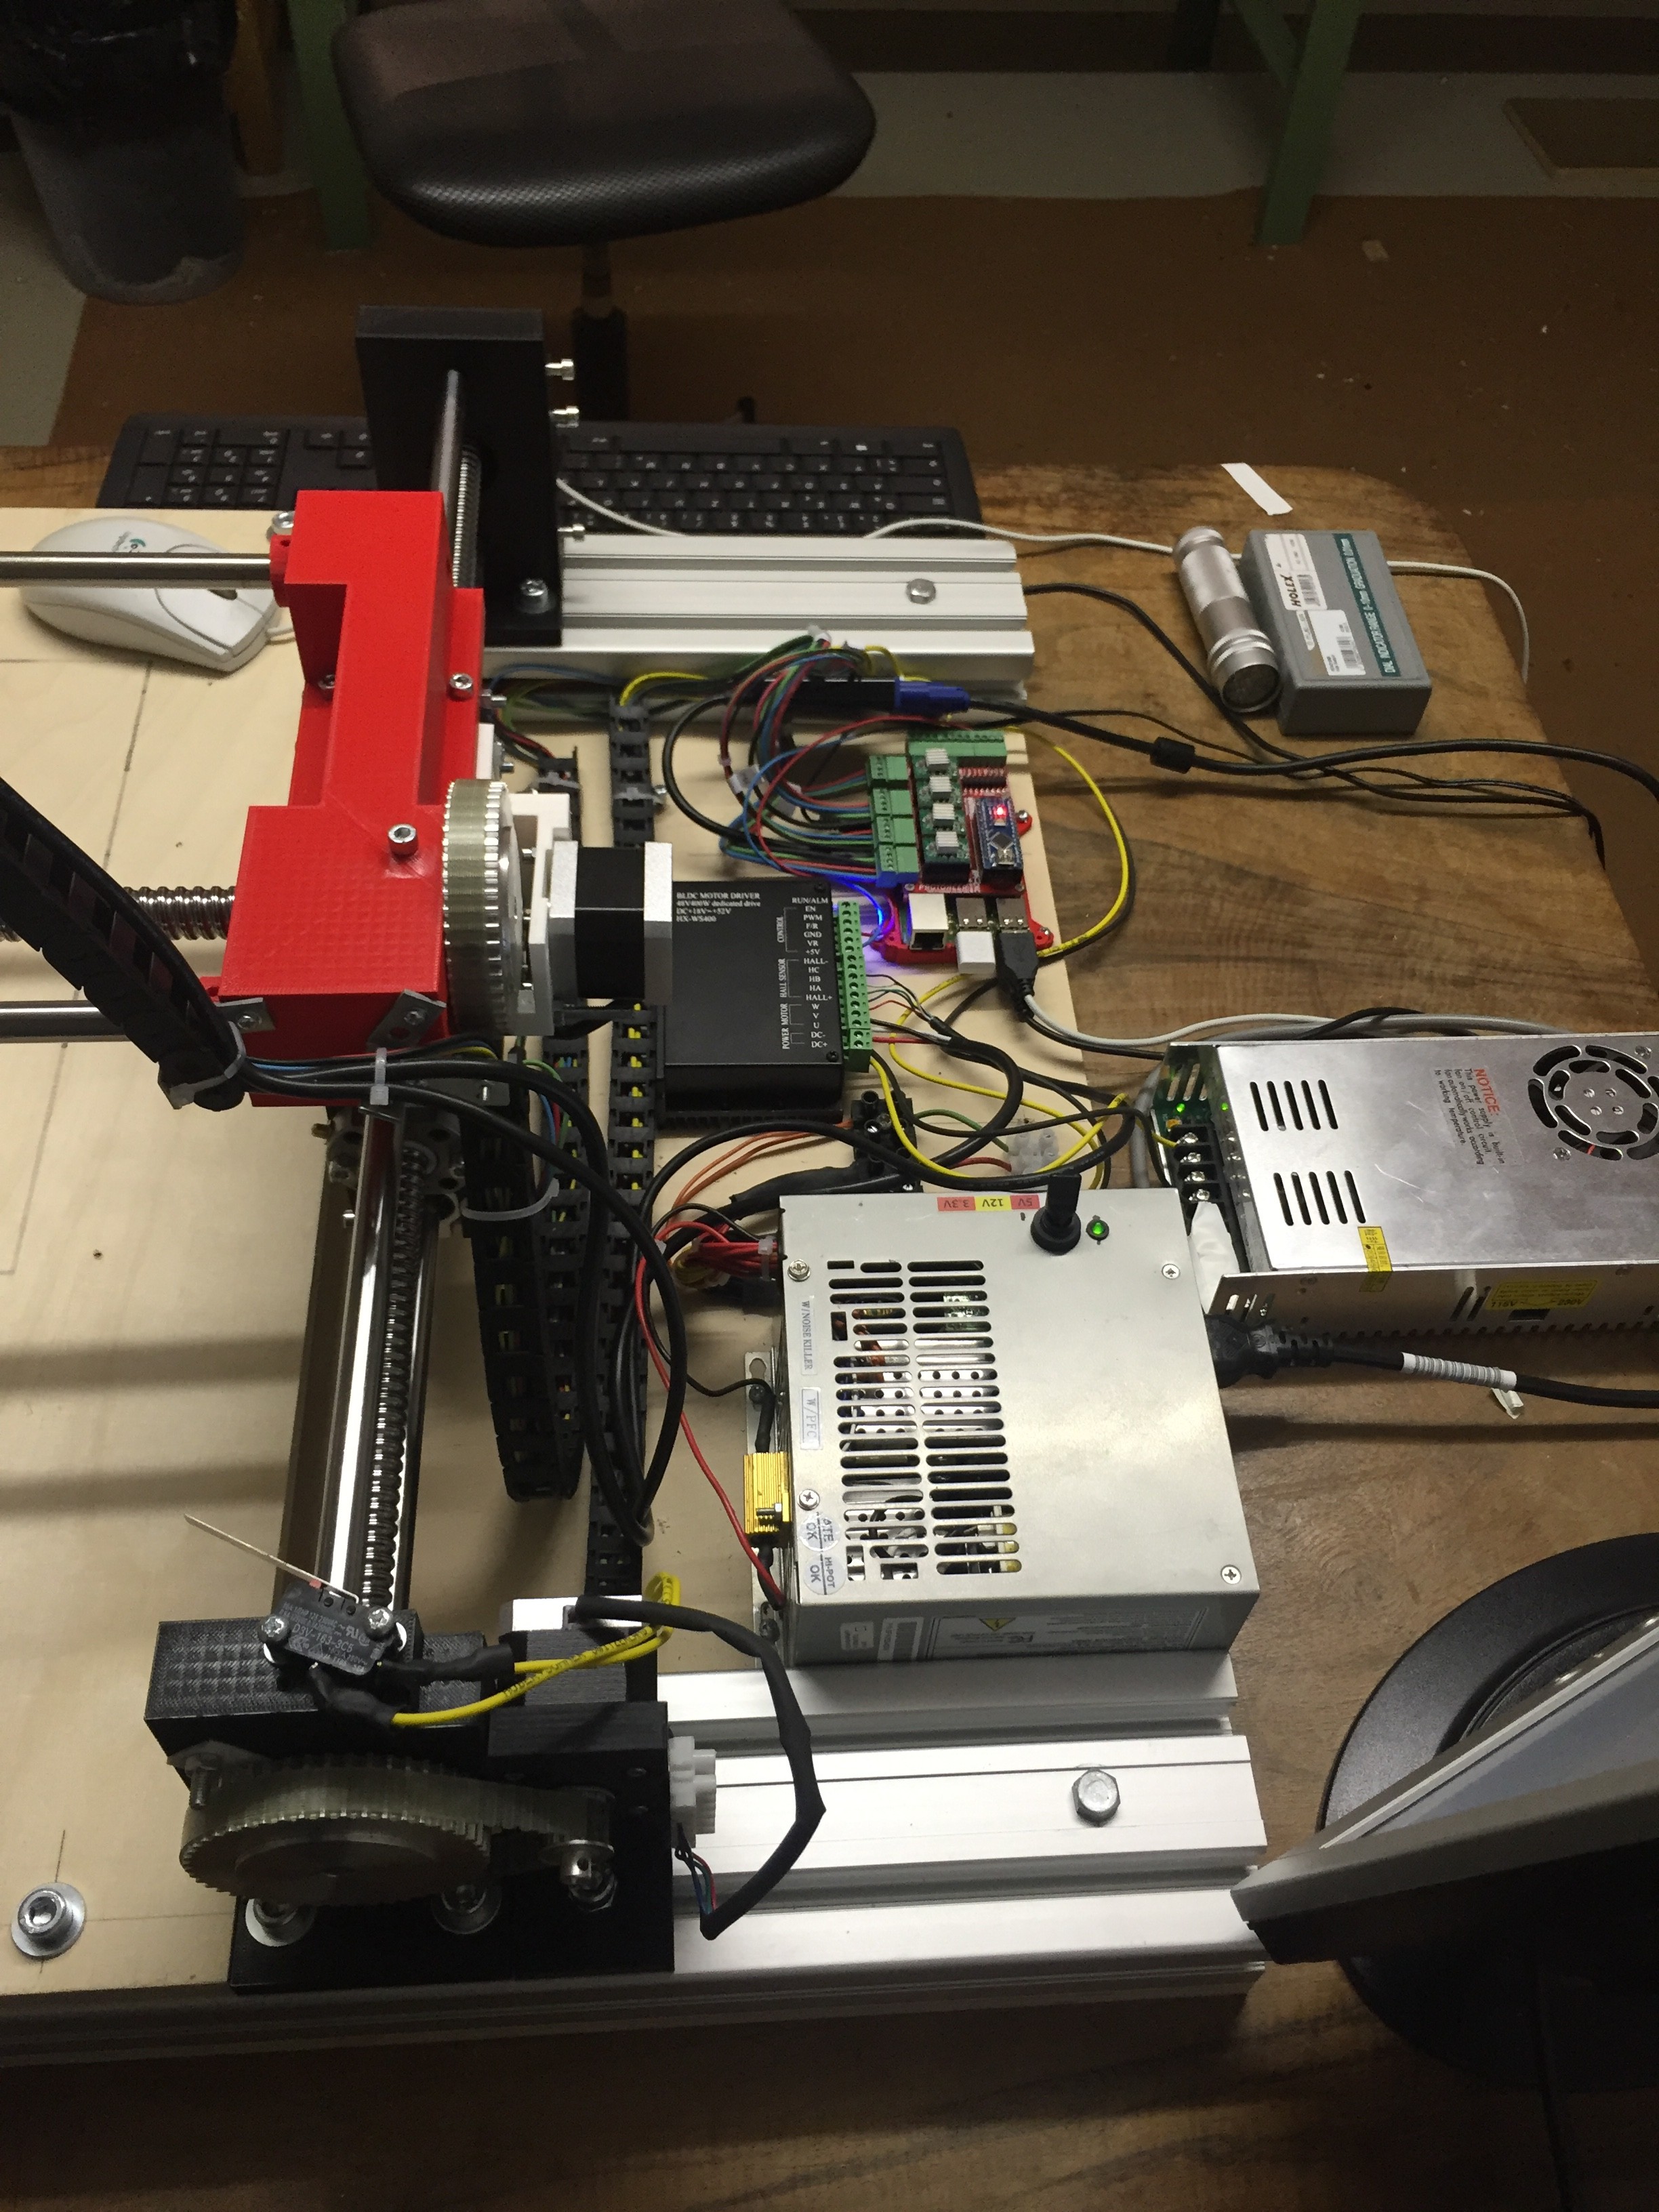
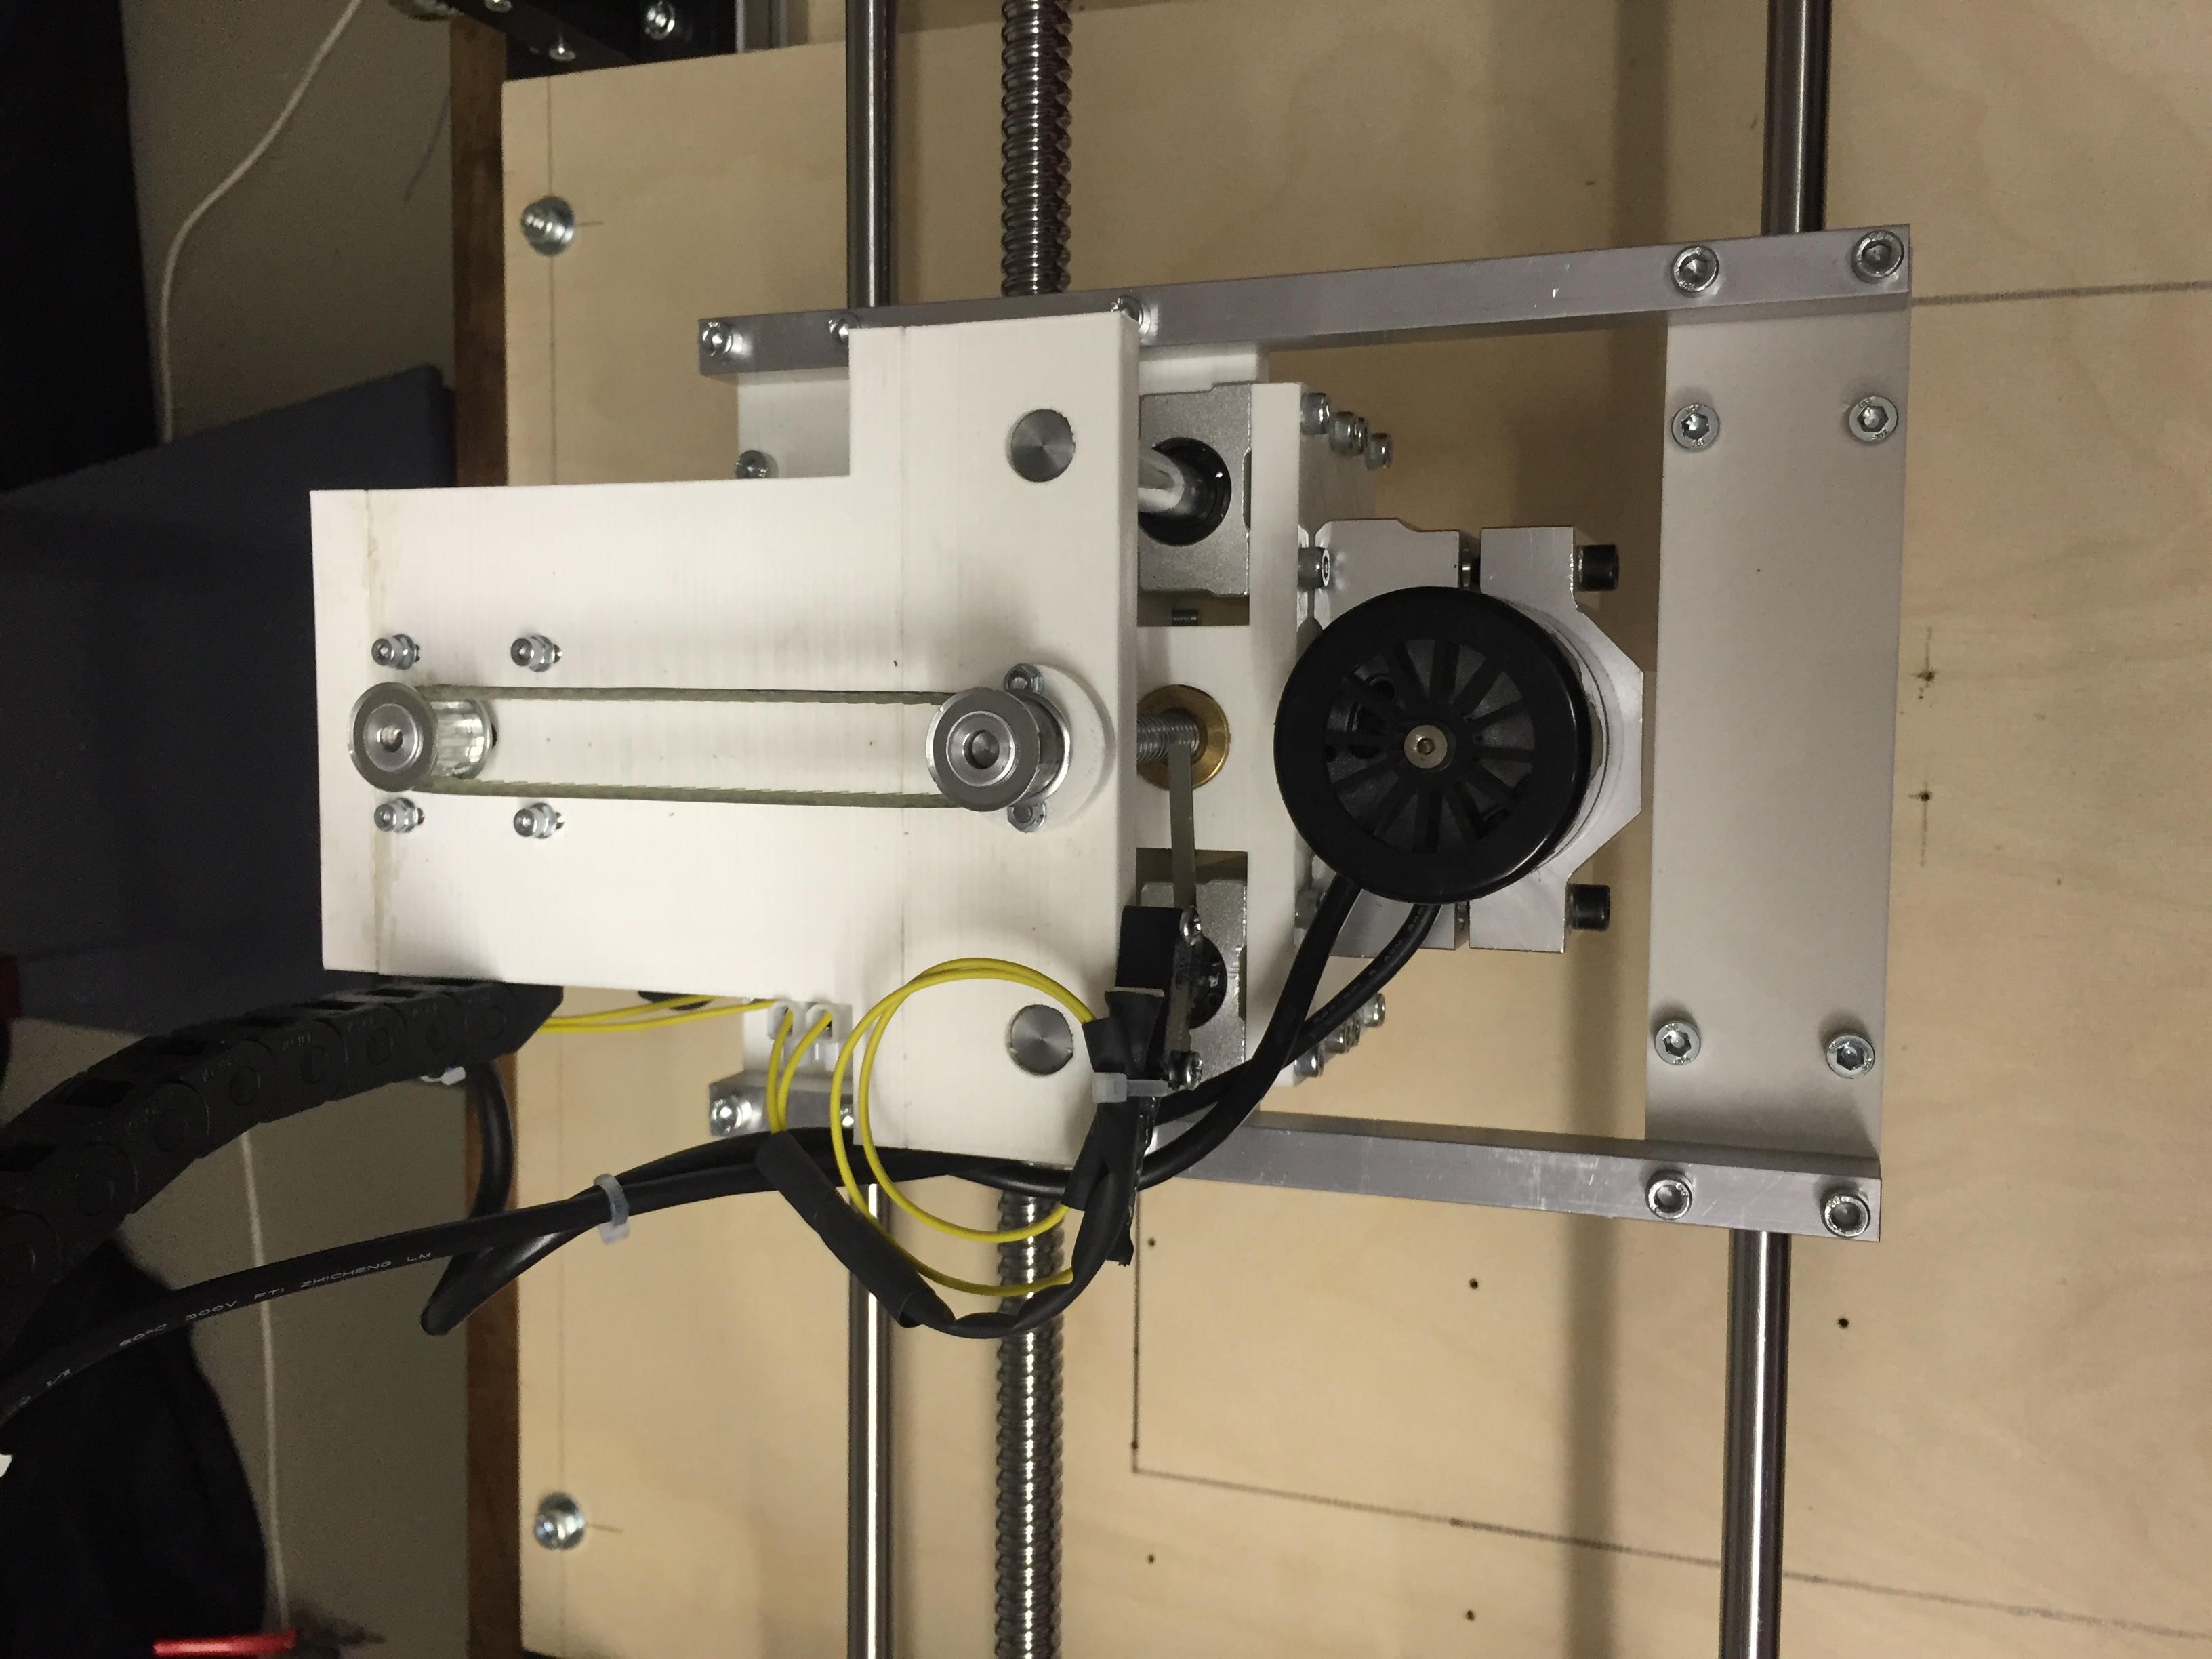
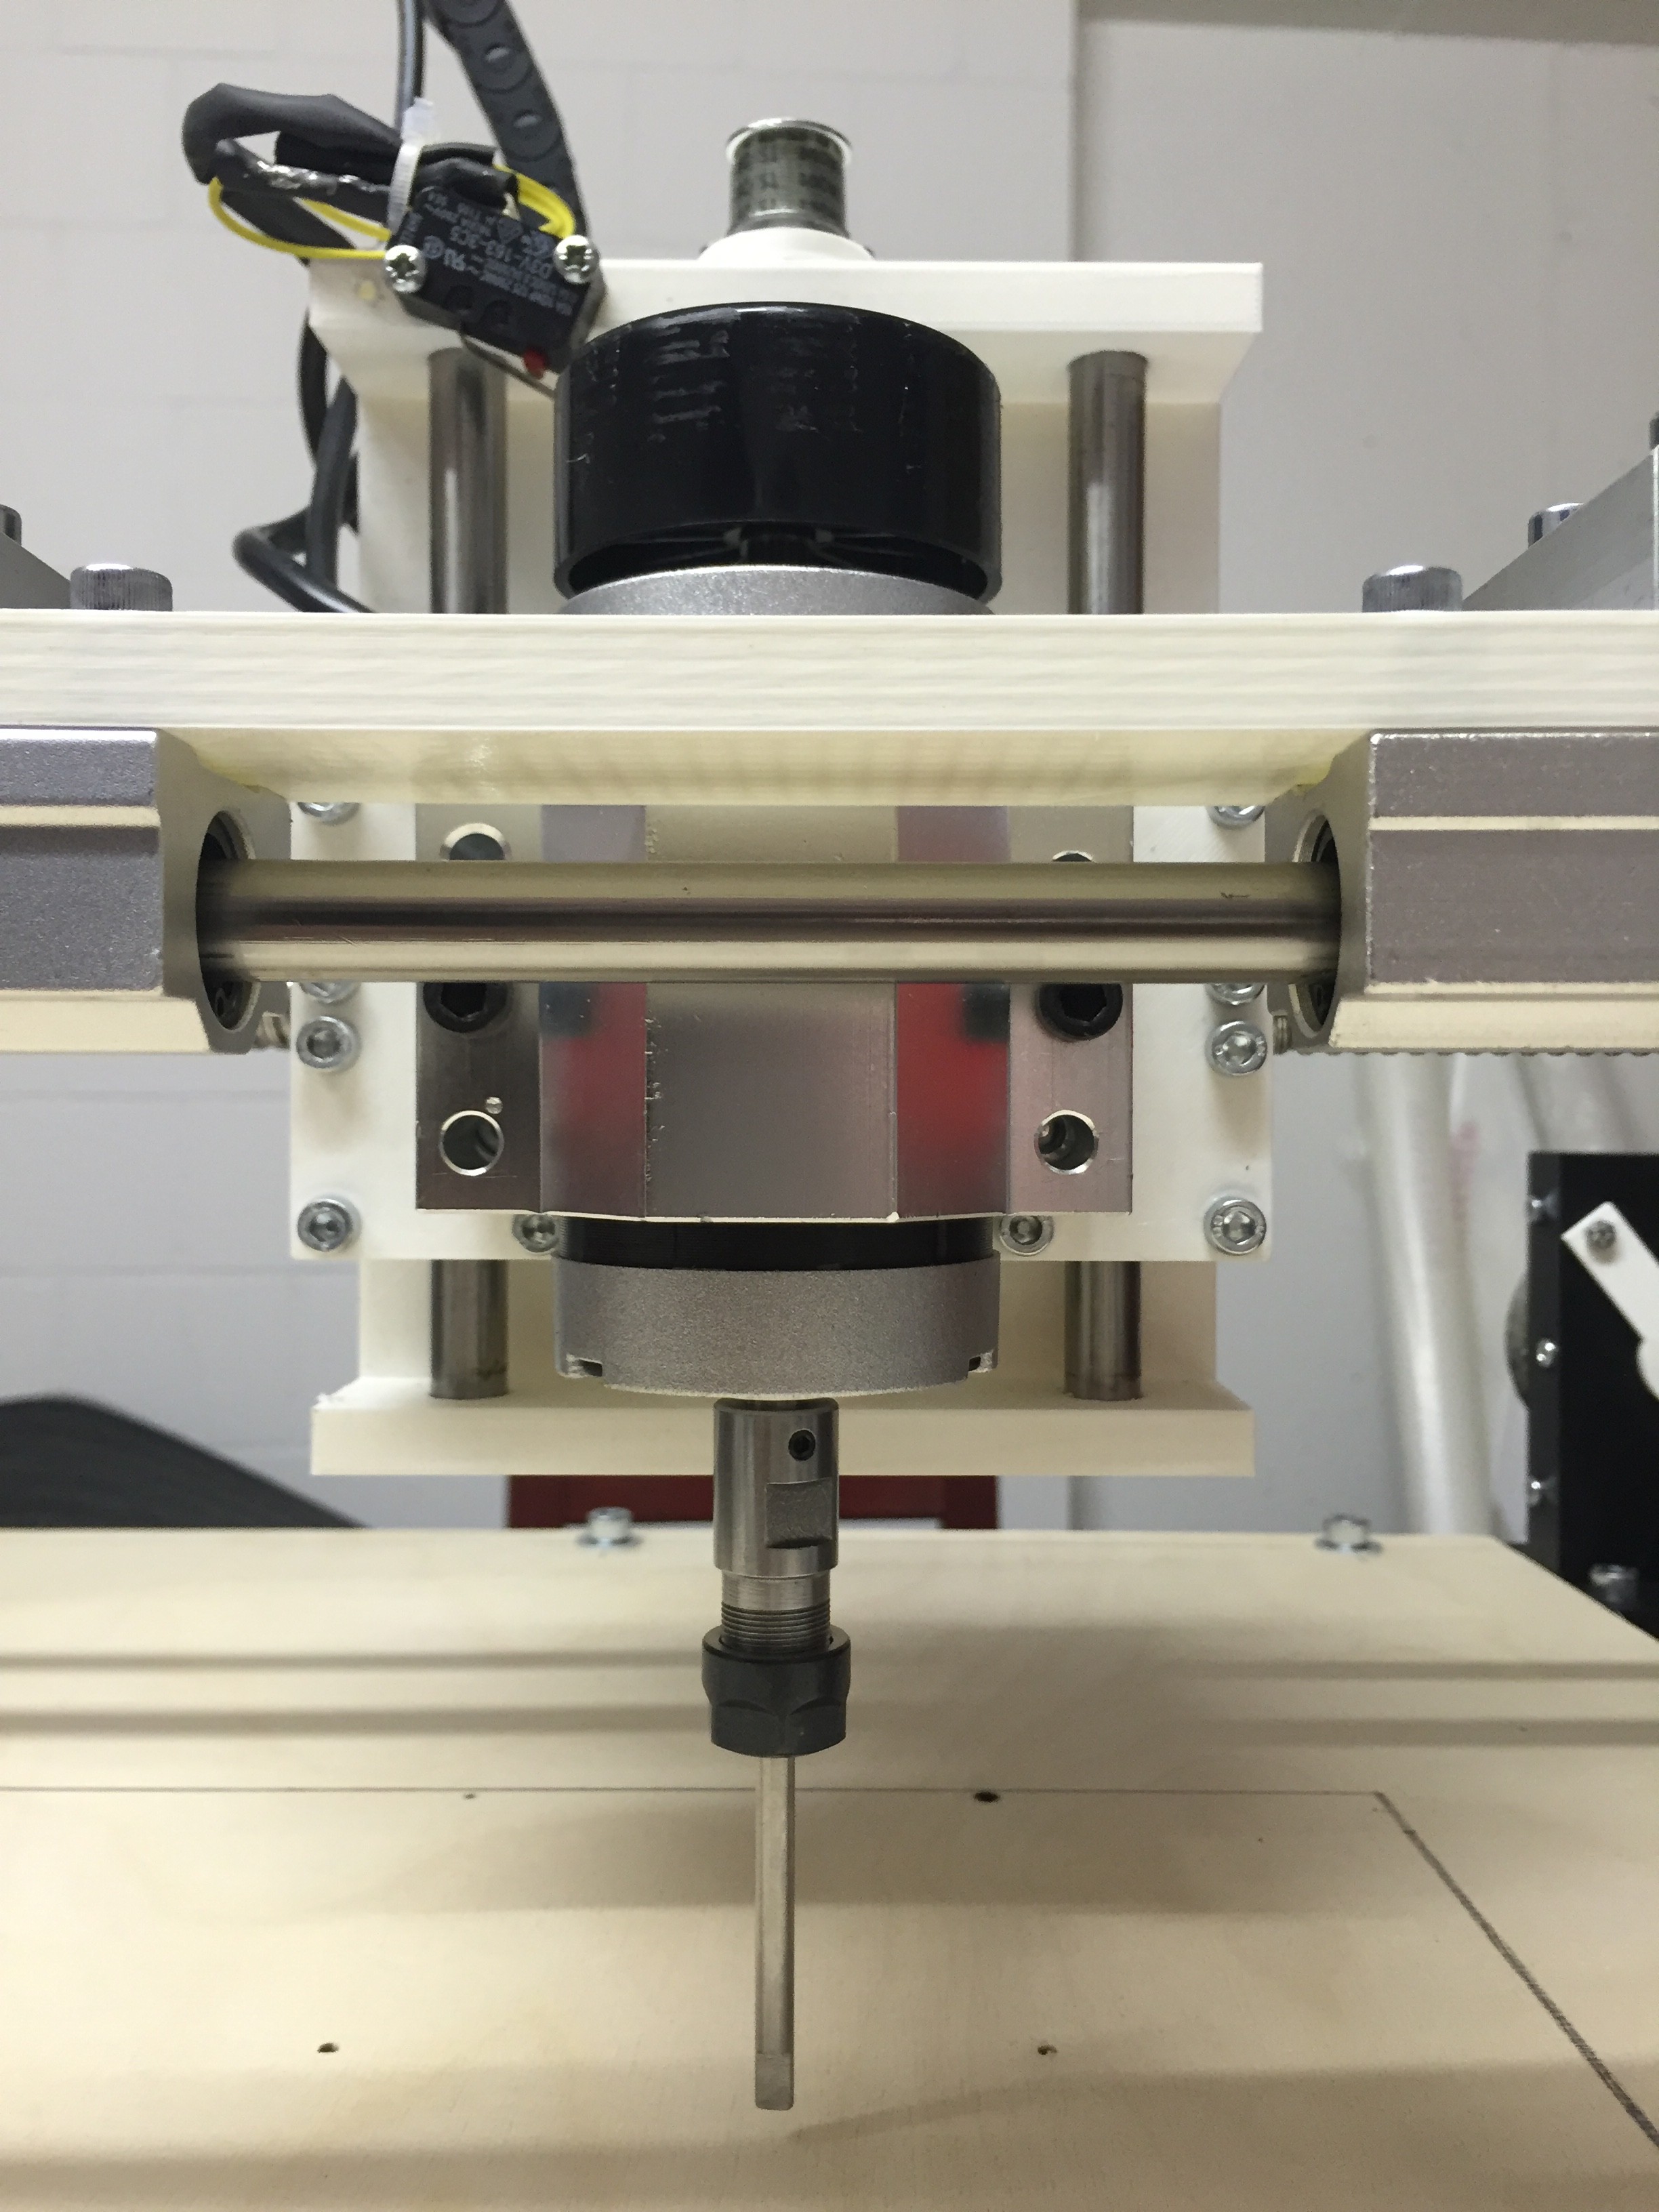
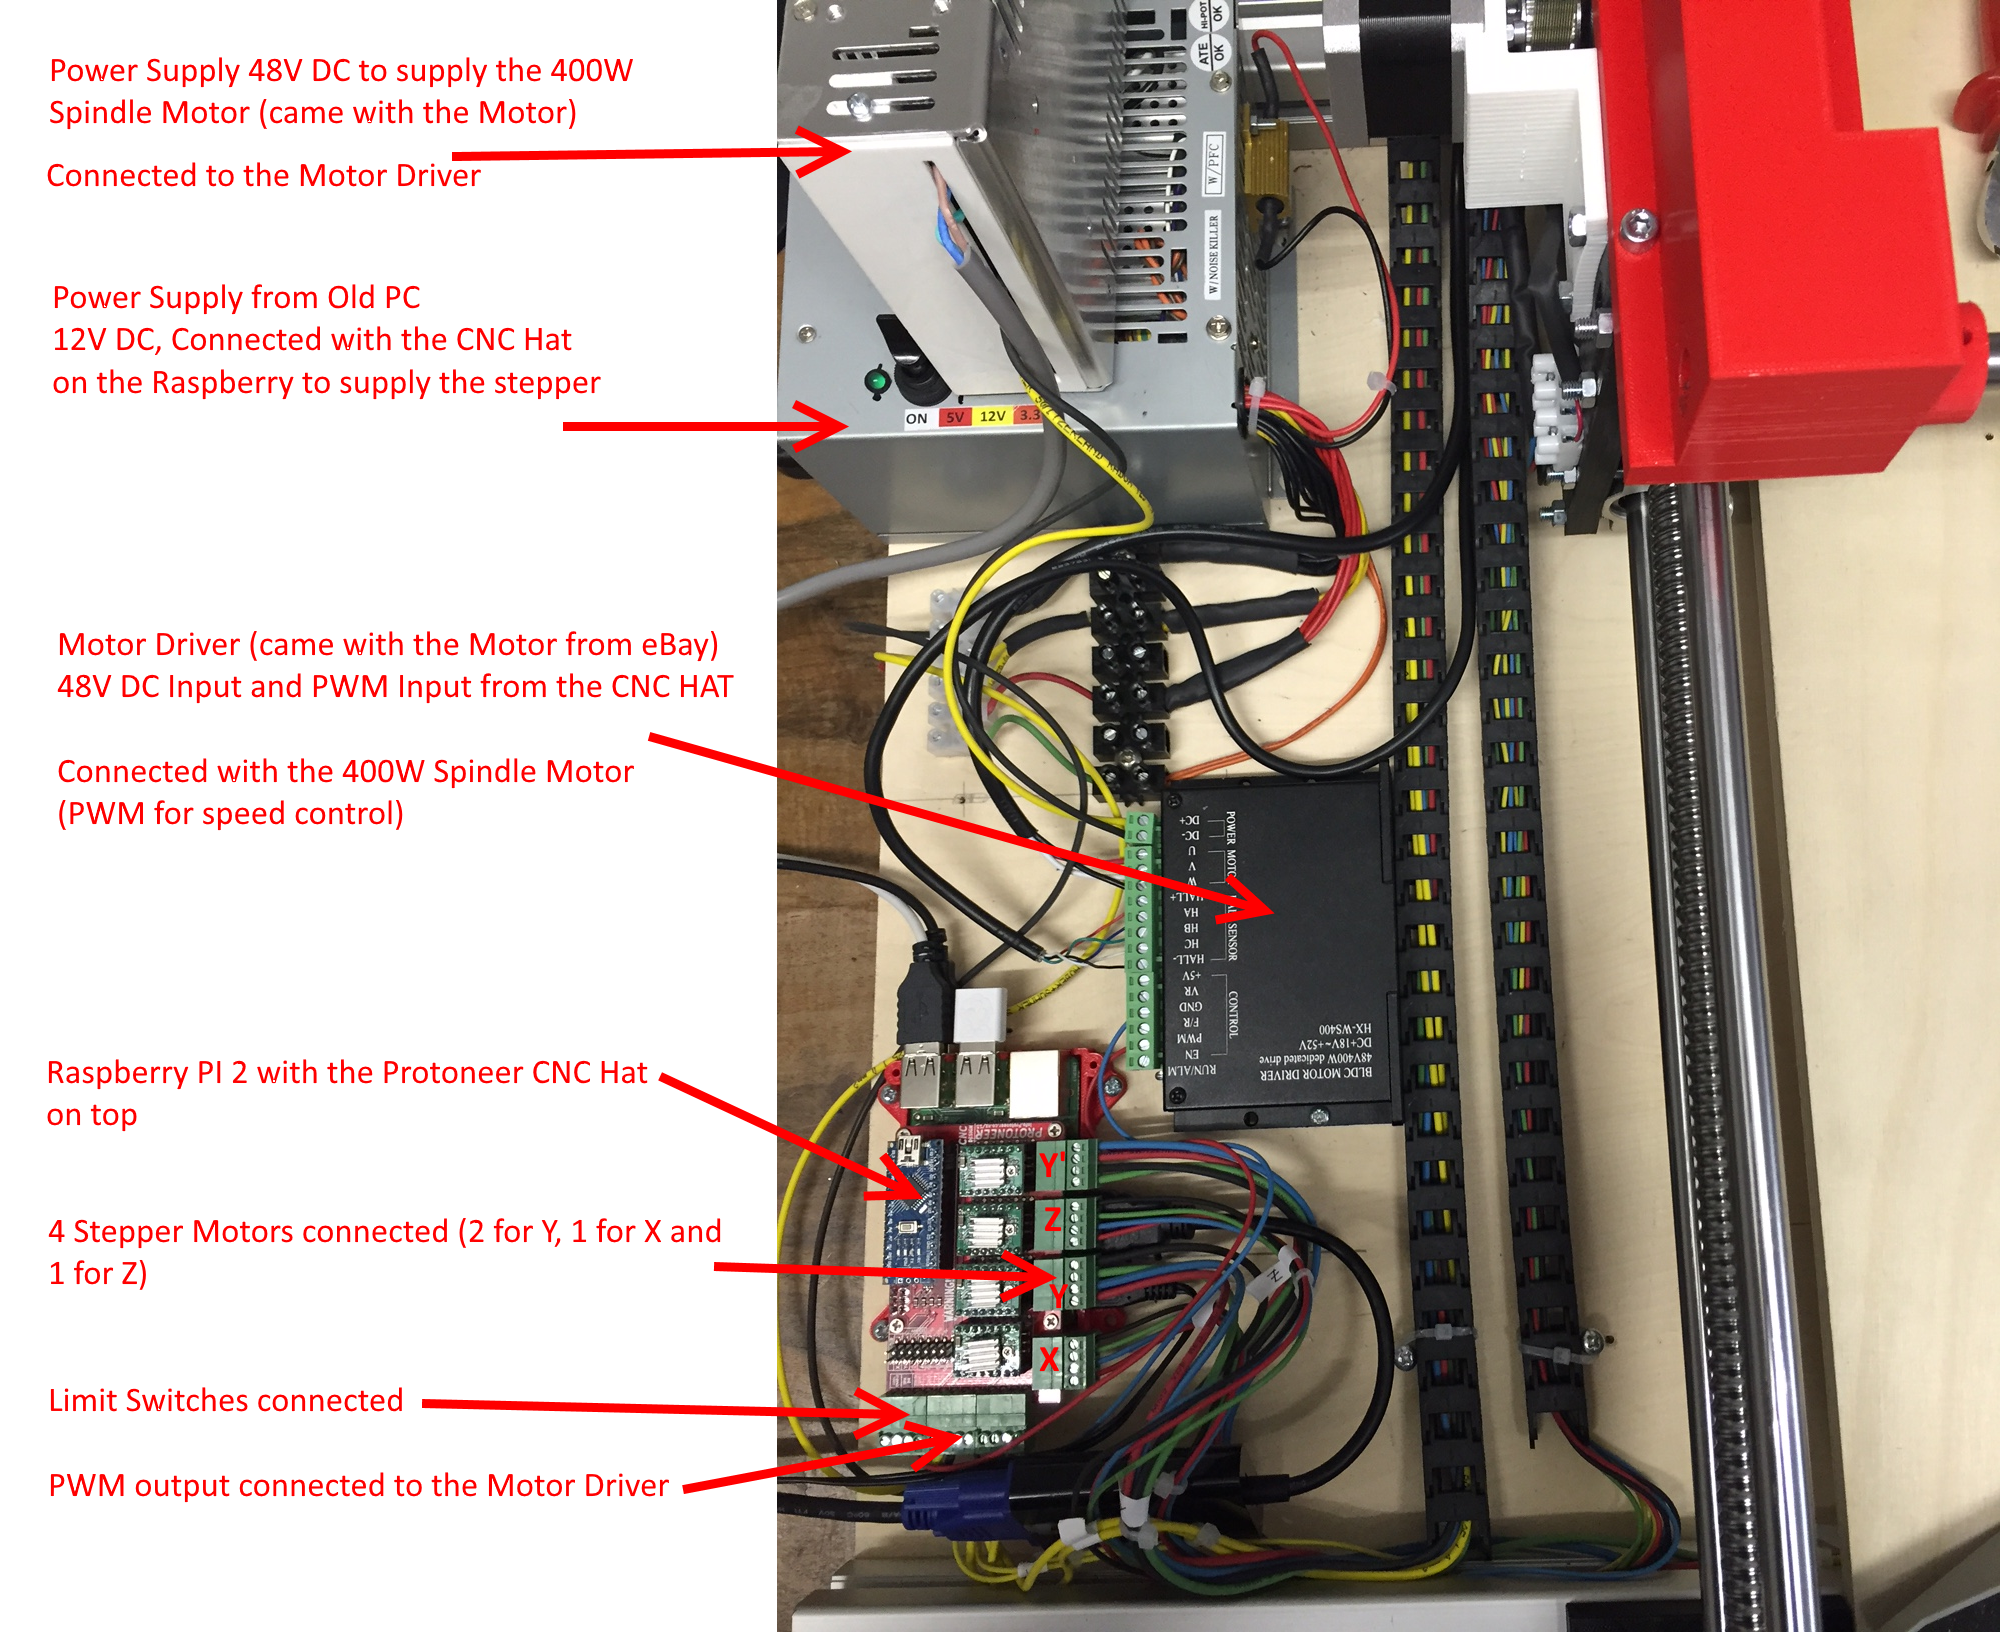
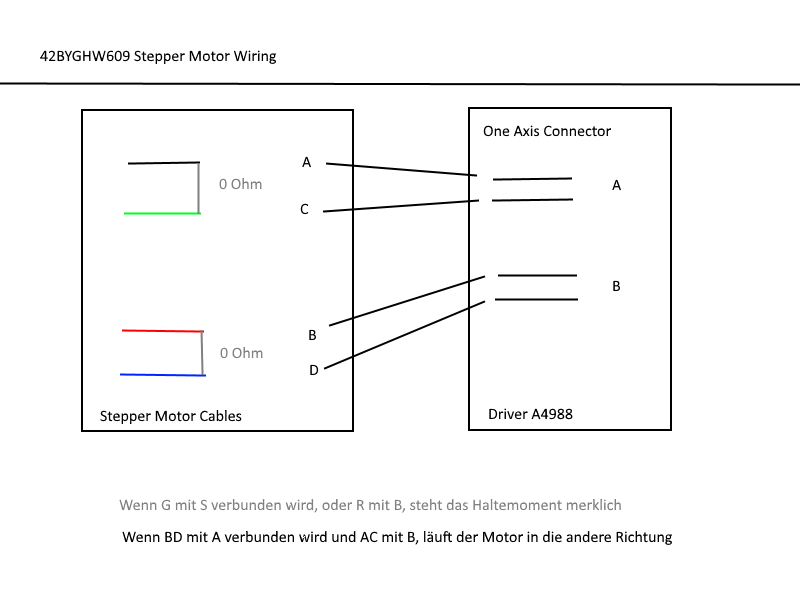
| 5 | Wire the Stepper motors and end-switches. I used 0.5mm^2 Litze wires for everything. | See images for more details. |
| 6 |
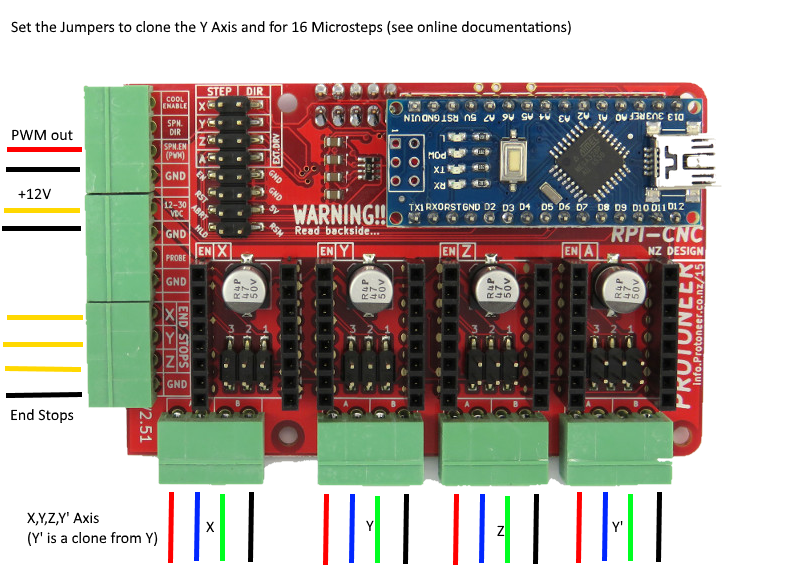
Configure the Electronics and Software: Stepper drivers get connected to the Raspberry CNC Hat. I did run the steppers with 16 Microsteps, Important Links Set the Jumpers correctly to clone the Y Axis and for 16 Microsteps Install the Image to the Raspberry. This includes everything you need! (bCNC GCODE Sender, GRBL, etc.) Setup GRBL with the correct Machine settings: If you use same gears I did and the steppers with 200 full-steps and 16 micro-steps, the Machine settings are: For power supply, I was using an old PC power supply. Here is a great tutorial, how to do it! |
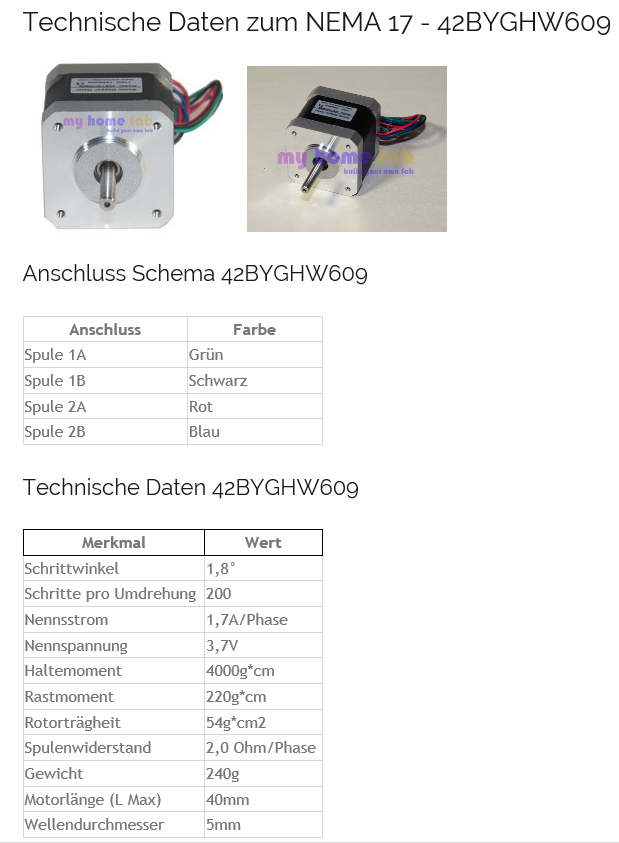
I used NEMA 17 42BYGHW 609 Stepper Motors with A4988 Stepper driver |
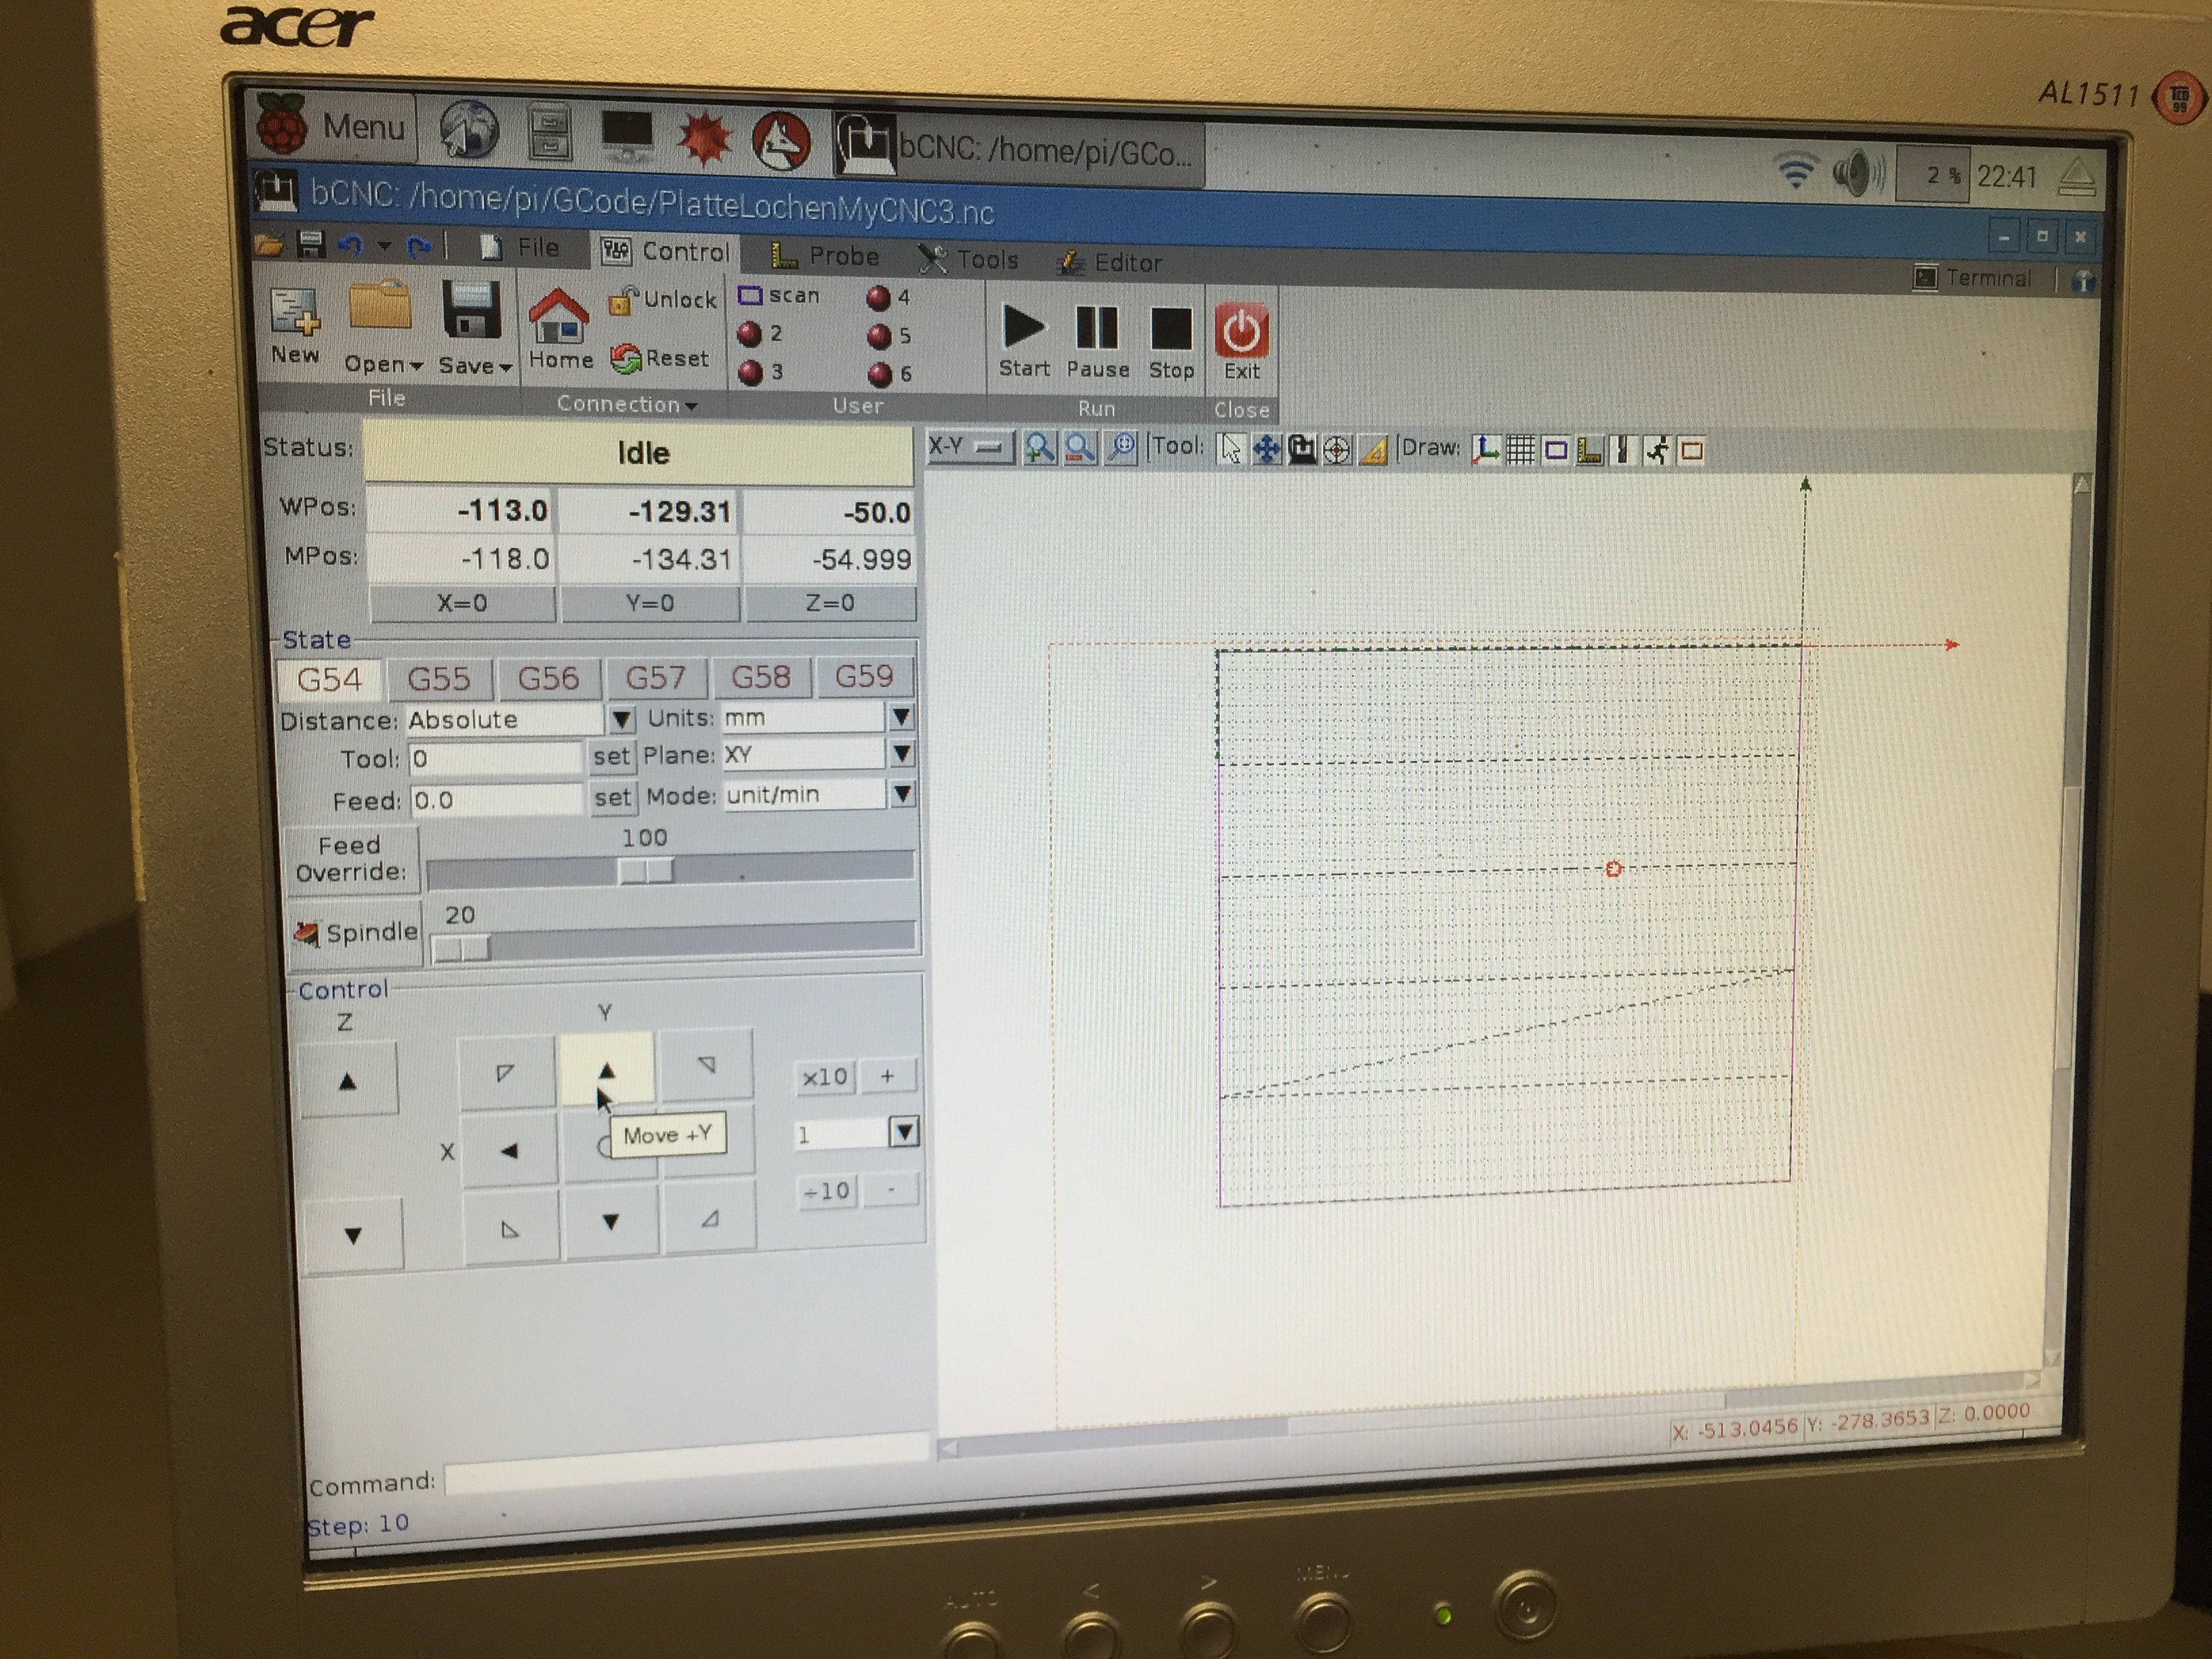
| 7 | Connect your Raspberry with a USB WIFI dongle to your network and copy your GCODE to the Raspberry. I Used HSMxPress in SolidWorks 2013 and EstlCAM Software to generate the .NC files containing the GCODE. Press start in bCNC! |
New 3 Axis CNC Platform
by mallemann
on Sketchfab
3D PDF: MyCNC_V3
Precision (3 times 1mm forward and 3 times 1mm back)
Repeat Precision: 0.01mm
Reverse backlash: 0.02mm
The Real Thing in Action:
Drilling Wood:
Milling in Plastic (POM Polyacetal)
Images: